
This article or section contains information that is out-of-date.
|
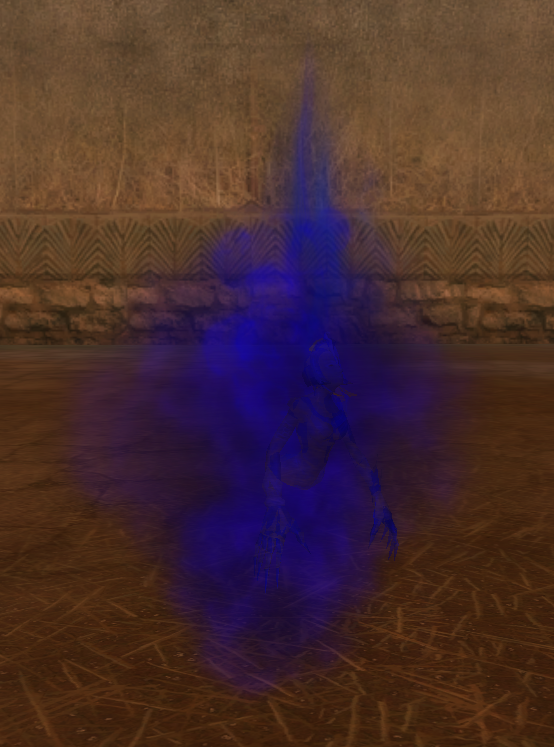
A spirit that can be absorbed for Nuema Orbs.
Nuemas are a component of the War Avatar System. Similar to War Avatar Cards, there are 6 different types of Nuemas and leveling these will permanently improve character stats. They are not affected by your War Avatar Cards and are instead considered as a separate stat boost within the War Avatar System.
Nuemas can be accessed by opening the War Avatar System through your Inventory by pressing the B key.
Overview[ | ]
In the War Avatar window, to the left of the currently viewed War Avatar Card is the Nuema. Each War Avatar slot type has a Nuema, meaning there are 6 different types of Nuemas - Destroyer, Battle, Longevity, Durability, Soulprime, and Lifeprime.
The stats that can be increased for each type of Nuema are the same as they are for War Avatar Cards:
- Destroyer slot: Physical and Magic Attack
- Battle slot: Physical and Magic Attack
- Longevity slot: Health and Physical Defense
- Durability slot: Health and Magic Defense
- Soulprime slot: Spirit
- Lifeprime slot: Spirit
Nuema levels are referred to as tiers. The maximum tier is currently 8. Each tier will grant the player with permanent stat boosts that increase with each tier. By default, your Nuema tiers will be 0 and will not add any stats until it has been leveled. Each tier has a level requirement.
| Tier | Level Requirement | Nuema EXP For Next Level |
|---|---|---|
| Tier 0 | Level 1 | 450 |
| Tier 1 | Level 1 | 1,100 |
| Tier 2 | Level 20 | 2,000 |
| Tier 3 | Level 45 | 3,200 |
| Tier 4 | Level 60 | 4,900 |
| Tier 5 | Level 80 | 7,000 |
| Tier 6 | Level 95 | 9,900 |
| Tier 7 | Level 101 | 17,800 |
| Tier 8 | Level 102 | - |
| Total EXP | 46350 | |
Stat Bonuses[ | ]
Each tier of Nuema grants the player with permanent stat boosts. The amount of stats for each tier is different for each class, depending on their primary armor type with the exception of assassins, who are granted lower attack stats than archers and duskblades. Note that War Avatar Cards will not affect these stat bonuses and vice versa.
| Level | Destroyer | Battle | Longevity | Durability | Soulprime | Lifeprime |
|---|---|---|---|---|---|---|
| 1 | Physical Attack +10 Magic Attack +10 |
Physical Attack +10 Magic Attack +10 |
HP +13 Physical Defense +28 |
HP +20 Magic Defense +42 |
Spirit +3 | Spirit +3 |
| 2 | Physical Attack +25 Magic Attack +25 |
Physical Attack +25 Magic Attack +25 |
HP +33 Physical Defense +70 |
HP +50 Magic Defense +105 |
Spirit +6 | Spirit +6 |
| 3 | Physical Attack +45 Magic Attack +45 |
Physical Attack +45 Magic Attack +45 |
HP +59 Physical Defense +126 |
HP +89 Magic Defense +189 |
Spirit +11 | Spirit +11 |
| 4 | Physical Attack +70 Magic Attack +70 |
Physical Attack +70 Magic Attack +70 |
HP +92 Physical Defense +196 |
HP +139 Magic Defense +294 |
Spirit +17 | Spirit +17 |
| 5 | Physical Attack +100 Magic Attack +100 |
Physical Attack +100 Magic Attack +100 |
HP +132 Physical Defense +280 |
HP +198 Magic Defense +420 |
Spirit +25 | Spirit +25 |
| 6 | Physical Attack +130 Magic Attack +130 |
Physical Attack +130 Magic Attack +130 |
HP +172 Physical Defense +364 |
HP +257 Magic Defense +546 |
Spirit +32 | Spirit +32 |
| 7 | Physical Attack +160 Magic Attack +160 |
Physical Attack +160 Magic Attack +160 |
HP +211 Physical Defense +448 |
HP +317 Magic Defense +672 |
Spirit +40 | Spirit +40 |
| 8 | Physical Attack +200 Magic Attack +200 |
Physical Attack +200 Magic Attack +200 |
HP +264 Physical Defense +560 |
HP +396 Magic Defense +840 |
Spirit +50 | Spirit +50 |
| Level | Destroyer | Battle | Longevity | Durability | Soulprime | Lifeprime |
|---|---|---|---|---|---|---|
| 1 | Physical Attack +8 Magic Attack +8 |
Physical Attack +8 Magic Attack +8 |
HP +13 Physical Defense +28 |
HP +20 Magic Defense +42 |
Spirit +3 | Spirit +3 |
| 2 | Physical Attack +19 Magic Attack +19 |
Physical Attack +19 Magic Attack +19 |
HP +33 Physical Defense +70 |
HP +50 Magic Defense +105 |
Spirit +6 | Spirit +6 |
| 3 | Physical Attack +34 Magic Attack +34 |
Physical Attack +34 Magic Attack +34 |
HP +59 Physical Defense +126 |
HP +89 Magic Defense +189 |
Spirit +11 | Spirit +11 |
| 4 | Physical Attack +52 Magic Attack +52 |
Physical Attack +52 Magic Attack +52 |
HP +92 Physical Defense +196 |
HP +139 Magic Defense +294 |
Spirit +17 | Spirit +17 |
| 5 | Physical Attack +75 Magic Attack +75 |
Physical Attack +75 Magic Attack +75 |
HP +132 Physical Defense +280 |
HP +198 Magic Defense +420 |
Spirit +25 | Spirit +25 |
| 6 | Physical Attack +97 Magic Attack +97 |
Physical Attack +97 Magic Attack +97 |
HP +172 Physical Defense +364 |
HP +257 Magic Defense +546 |
Spirit +32 | Spirit +32 |
| 7 | Physical Attack +120 Magic Attack +120 |
Physical Attack +120 Magic Attack +120 |
HP +211 Physical Defense +448 |
HP +317 Magic Defense +672 |
Spirit +40 | Spirit +40 |
| 8 | Physical Attack +150 Magic Attack +150 |
Physical Attack +150 Magic Attack +150 |
HP +264 Physical Defense +560 |
HP +396 Magic Defense +840 |
Spirit +50 | Spirit +50 |
| Level | Destroyer | Battle | Longevity | Durability | Soulprime | Lifeprime |
|---|---|---|---|---|---|---|
| 1 | Physical Attack +10 Magic Attack +10 |
Physical Attack +10 Magic Attack +10 |
HP +7 Physical Defense +14 |
HP +23 Magic Defense +49 |
Spirit +3 | Spirit +3 |
| 2 | Physical Attack +25 Magic Attack +25 |
Physical Attack +25 Magic Attack +25 |
HP +17 Physical Defense +35 |
HP +58 Magic Defense +122 |
Spirit +6 | Spirit +6 |
| 3 | Physical Attack +45 Magic Attack +45 |
Physical Attack +45 Magic Attack +45 |
HP +30 Physical Defense +63 |
HP +104 Magic Defense +220 |
Spirit +11 | Spirit +11 |
| 4 | Physical Attack +70 Magic Attack +70 |
Physical Attack +70 Magic Attack +70 |
HP +46 Physical Defense +98 |
HP +162 Magic Defense +343 |
Spirit +17 | Spirit +17 |
| 5 | Physical Attack +100 Magic Attack +100 |
Physical Attack +100 Magic Attack +100 |
HP +66 Physical Defense +140 |
HP +231 Magic Defense +490 |
Spirit +25 | Spirit +25 |
| 6 | Physical Attack +130 Magic Attack +130 |
Physical Attack +130 Magic Attack +130 |
HP +86 Physical Defense +182 |
HP +300 Magic Defense +637 |
Spirit +32 | Spirit +32 |
| 7 | Physical Attack +160 Magic Attack +160 |
Physical Attack +160 Magic Attack +160 |
HP +106 Physical Defense +224 |
HP +370 Magic Defense +784 |
Spirit +40 | Spirit +40 |
| 8 | Physical Attack +200 Magic Attack +200 |
Physical Attack +200 Magic Attack +200 |
HP +132 Physical Defense +280 |
HP +462 Magic Defense +980 |
Spirit +50 | Spirit +50 |
| Level | Destroyer | Battle | Longevity | Durability | Soulprime | Lifeprime |
|---|---|---|---|---|---|---|
| 1 | Physical Attack +10 Magic Attack +10 |
Physical Attack +10 Magic Attack +10 |
HP +23 Physical Defense +49 |
HP +13 Magic Defense +28 |
Spirit +3 | Spirit +3 |
| 2 | Physical Attack +25 Magic Attack +25 |
Physical Attack +25 Magic Attack +25 |
HP +58 Physical Defense +122 |
HP +33 Magic Defense +70 |
Spirit +6 | Spirit +6 |
| 3 | Physical Attack +45 Magic Attack +45 |
Physical Attack +45 Magic Attack +45 |
HP +104 Physical Defense +220 |
HP +59 Magic Defense +126 |
Spirit +11 | Spirit +11 |
| 4 | Physical Attack +70 Magic Attack +70 |
Physical Attack +70 Magic Attack +70 |
HP +162 Physical Defense +343 |
HP +92 Magic Defense +196 |
Spirit +17 | Spirit +17 |
| 5 | Physical Attack +100 Magic Attack +100 |
Physical Attack +100 Magic Attack +100 |
HP +231 Physical Defense +490 |
HP +132 Magic Defense +280 |
Spirit +25 | Spirit +25 |
| 6 | Physical Attack +130 Magic Attack +130 |
Physical Attack +130 Magic Attack +130 |
HP +300 Physical Defense +637 |
HP +172 Magic Defense +364 |
Spirit +32 | Spirit +32 |
| 7 | Physical Attack +160 Magic Attack +160 |
Physical Attack +160 Magic Attack +160 |
HP +370 Physical Defense +784 |
HP +211 Magic Defense +448 |
Spirit +40 | Spirit +40 |
| 8 | Physical Attack +200 Magic Attack +200 |
Physical Attack +200 Magic Attack +200 |
HP +462 Physical Defense +980 |
HP +264 Magic Defense +560 |
Spirit +50 | Spirit +50 |
Leveling Nuema Tiers[ | ]
To level up Nuema tiers, the player must absorb Nuema Orbs. There are Nuema Orbs for each type of tier - Destroyer, Battle, Longevity, Durability, Soulprime, and Lifeprime. There are also two different types of orbs - Origin Orbs and Essence Orbs. Origin Orbs are the more common type of orb, while Essence Orbs are rarer and give three times the EXP of an Origin Orb.
There are multiple ways to obtain Nuema Orbs:
- Killing Bosses: Players can farm certain dungeons to get Nuema Orbs, though it is limited to 20 Nuema Orbs per week. It is also the longest but cheapest method.
- Resource Wars: Players who are in factions can use Soldiers' Pay obtained from Resource Wars for Nuema Orbs. They can also be spent to change one type of Nuema Orb to another, however it is costly.
- Bounty Hunter: Level 100+ Bounty Hunter I quests can award players with a Head Hunter's Treasure Chest, where players have the option of choosing 5 Soul Forge Packs which contain random Tier 6 Origin Orbs.
- Lucky Coins: Players can exchange Lucky Coins for tier 6 Origin Orbs. This is the fastest, yet most expensive method.
Using Nuema Orbs[ | ]
When using Nuema Orbs, their effectiveness depends on the current tier level of the Nuema Orb you are trying to absorb versus your current Nuema tier. If your Nuema tier is at least 2 levels lower than the Nuema Orb's tier, then you will only gain partial Nuema EXP from the orb, with less EXP being absorbed the lower your Nuema tier is compared to the Nuema Orb's tier. If you absorb Nuema Orbs that have a lower tier than your current Nuema tier, you will gain the full EXP from the orb.
Unlike Nuema tiers themselves, Nuema Orbs do not have a level requirement, so they can be consumed at any level. There is no limit to how many Nuema Orbs you can consume per week, however you will not be able to use any more orbs of a certain type if your corresponding Nuema tier is at its maximum level.
Farming Nuema Orbs[ | ]
Players can get Nuema Orbs by killing certain bosses in dungeons. After the boss has died, a spirit will appear for a short time which can be absorbed for a Nuema Orb. It is only available for 1 minute after it drops from a boss. The channeling time for absorbing a Nuema Orn from a spirit is random between 10 to 20 seconds. Multiple players can attempt to absorb the orb, however only one player will actually successfully absorb it. For this reason is it more beneficial to solo bosses to farm orbs. The type of Nuema Orb absorbed will be random, and has a small chance of being an Essence Orb instead of an Origin Orb.
Most bosses will only drop 1 spirit, with the exception of bosses in Undercurrent Hall, which drop 10 spirits instead, allowing for an entire squad of players to be able to absorb Nuema Orbs. Usually up to 2 can be absorbed before the spirits disappear. The amount of spirits that appear is not affected by 2x drop events.
The bosses that can be killed for Nuema Orbs are listed below. Bosses that can drop multiple tiers of Nuemas will only drop one of them at random. Each day only some of these bosses will drop Nuema Orbs. This can be checked by opening the War Avatar window from your Inventory (Default: B) and clicking the Nuema button in the bottom-left corner of the window. You can also view your remaining Nuema absorptions in the same window. Up to 20 Nuema Orbs can be absorbed per week from boss drops, with the limit resetting on Saturdays at midnight server time.
| Boss | Dungeon | Level of Nuema |
|---|---|---|
| Thromh the Mighty | Firecrag Grotto | Tier 1/Tier 2 |
| Rend Razorjaw | Den of Rabid Wolves | Tier 1/Tier 2 |
| Poisontail Occultist | Cave of the Vicious | Tier 1/Tier 2 |
| Qingzi | Hall of Deception | Tier 2/Tier 3 |
| Farren Sereneti | Gate of Delirium | Tier 2/Tier 3 |
| Calcid of the Flame | Gate of Delirium | Tier 2/Tier 3 |
| Fushma - Hexocelot Lieutenant | Secret Frostcover Grounds | Tier 3/Tier 4 |
| Rankar - Ferocious Ironskin | Secret Frostcover Grounds | Tier 3/Tier 4 |
| The Myriadtail Wyvern | Secret Frostcover Grounds | Tier 3/Tier 4 |
| Zimo | Valley of Disaster | Tier 4/Tier 5 |
| Ofotis | Valley of Disaster | Tier 4/Tier 5 |
| Qianji | Valley of Disaster | Tier 4/Tier 5 |
| Raving Drake Brute | Valley of Disaster | Tier 4/Tier 5 |
| Gluttonix | Valley of Disaster | Tier 4/Tier 5 |
| Serpentrex | Wraithgate | Tier 5/Tier 6 |
| Resentful Pyrosteosis | Wraithgate | Tier 5/Tier 6 |
| Undying Hornshell | Wraithgate | Tier 5/Tier 6 |
| Damned Gaurnob | Wraithgate | Tier 5/Tier 6 |
| Cenequus Polearm | Wraithgate | Tier 5/Tier 6 |
| Stygean Quartermaster | Hallucinatory Trench | Tier 6 |
| Hooli the Black | Hallucinatory Trench | Tier 6 |
| Bloodlusted Loon | Hallucinatory Trench | Tier 6 |
| Linus the Woeful | Hallucinatory Trench | Tier 6 |
| Brigand Transient | Hallucinatory Trench | Tier 6 |
| Inferno Lord Phyrex | Undercurrent Hall | Tier 7 |
| Tempest Dragon Cyrak | Undercurrent Hall | Tier 7 |
| Cyclone Dragon Miraxes | Undercurrent Hall | Tier 7 |
Recommended Farming[ | ]
When starting out with leveling lower Nuema tiers, Qingzi from Hall of Deception is a good candidate to farm as the dungeon is the shortest of all lower level dungeons. Once your Nuema tiers begin to get higher, other bosses to farm include ones from the Valley of Disaster, as usually multiple bosses from there are selected to drop Nuema Orbs.
For other dungeons such as Secret Frostcover Grounds it is important to consider the distance to reach certain bosses. For example, The Myriadtail Wyvern may take a long time to reach, along with Rankar depending on where he is currently located, so Fushma would be a better boss to farm as he is closer to the entrance.
When your Nuema tiers begin to reach higher levels, Hallucinatory Trench is a good candidate for farming on certain days when Stygean Quartermaster, Hooli the Black, and Bloodlusted Loon are all selected bosses to drop Nuema Orbs due to the short distance between each boss. Undercurrent Hall is also a good source for Nuema Orb farming at higher tiers however it does require a squad.