
 |
This article needs your help. The reason given was:
Please edit this page to resolve the problem and remove this tag. |
| This article is about the higher level version of Quicksand Maze for level 100+ players. For the lower level version for level 50+ players, see Quicksand Maze (Level 50). |
Quicksand Maze is a randomly-generated dungeon that was introduced in the Eclipse expansion. The higher level version of the dungeon is available to players that are level 100+ with a boundary level of Mirage Sky X or higher. The dungeon is used for farming materials for the second stage of Rank 8 gear otherwise known as R8RR, R8R, or R8R2 gear.
Overview[ | ]
Players that meet the dungeon requirements will need a Quicksand Smokewisp item to enter. Quicksand Smokewisp can be picked from the Starshower NPC outside Quicksand Maze. You enter by talking to the Starshower NPC.
After entering you can pick up a daily quest "Whirling Sands (Daily Quest)" at Dreamspace NPC which gives you random R8rr materials when completed. Dreamspace also offer you a quest "Bloodglass Mirror" which reveals the dungeon map structure for 4 hours.The squad leader can start the dungeon by talking to Dreamspace when everybody is inside. You need minimum of 7 squad members to start the dungeon.
Squad Structure[ | ]
- A tank: Barbarian is recommended, or very high HP Blademaster
- Debuffers: Seeker, Blademaster, Venomancer
- Stunlock and physical/melee damage: Assassin, Blademaster, Duskblade (at very least 2 characters of this type is recommended).
- Magic damage: Venomancer, Psychic, Stormbringer. Classes with Wood and Water elements are recommended.
- Healer/Purify: Cleric is highly recommended, but Mystic plus Sage Psychic combo can manage as well.
You might encounter bosses that are immune to physical damage, and bosses that are immune to magic damage. Using a mount in the dungeon will take around 7 minutes to get from entrance to end of the dungeon, if everything is cleared, therefore its recommended that your squads healers bring Resurrection Scrolls with them.
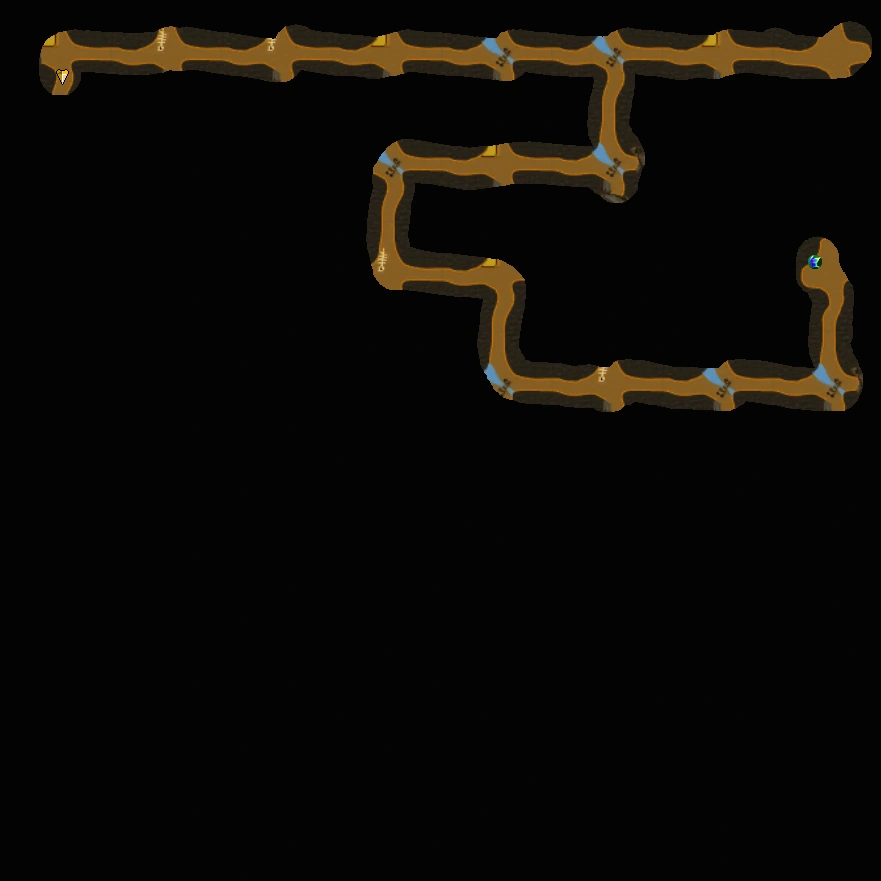
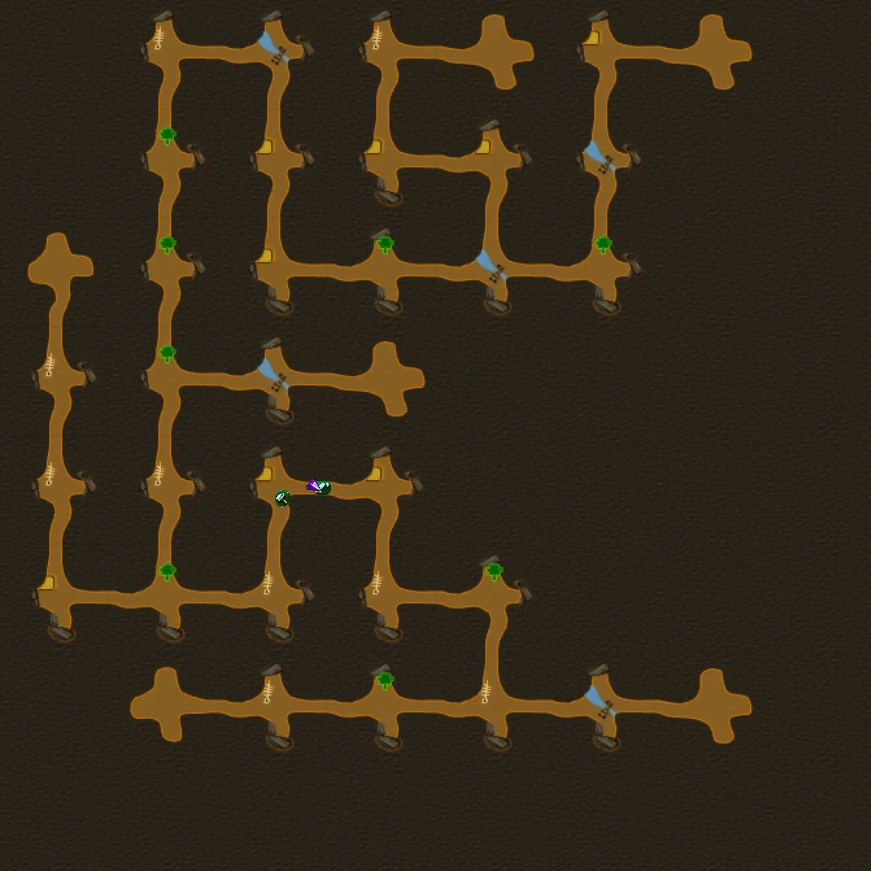
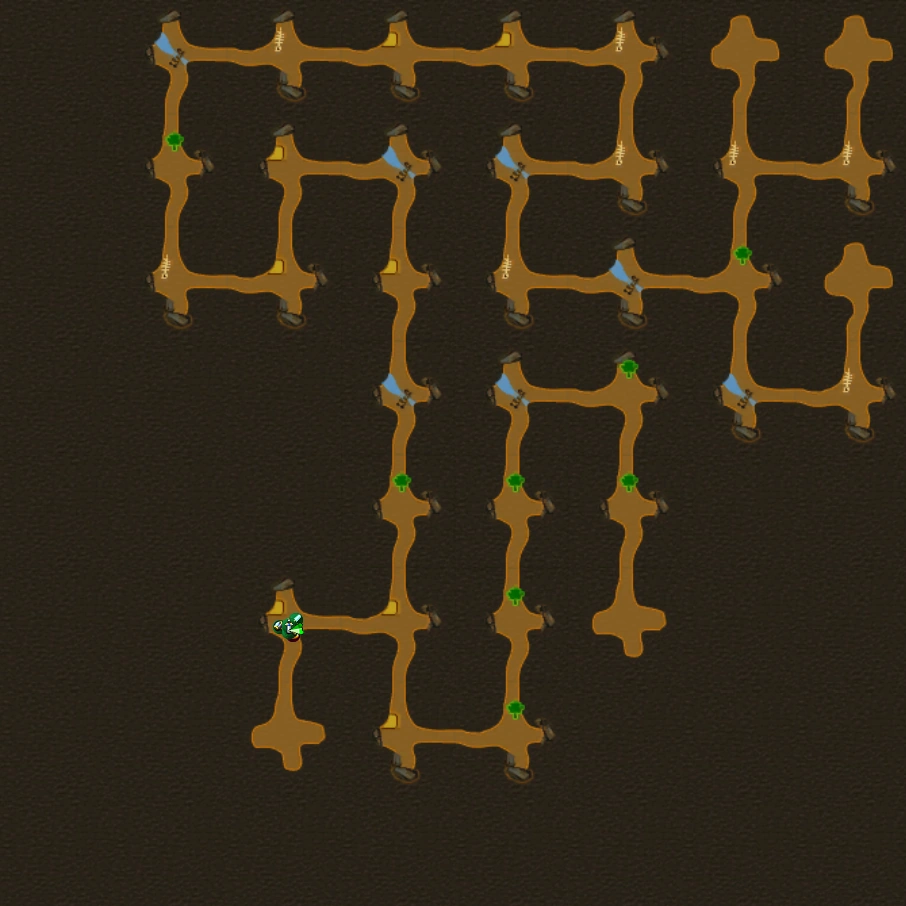
Map[ | ]

Map example without Bloodglass Mirror

Map example using Bloodglass Mirror

Map example using Bloodglass Mirror
[ | ]
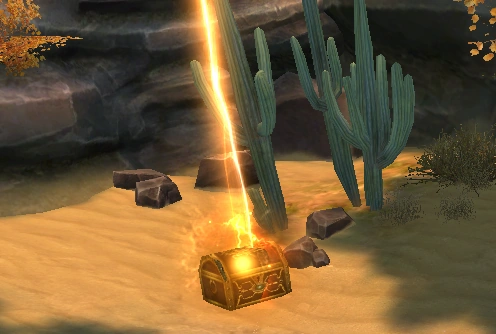
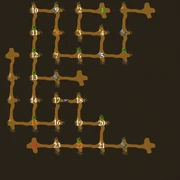
A Golden Chest.
Over time players have discovered tricks to find the "true path" to the final boss, thus mostly avoiding dead ends.
It is rumored that the true path are hidden and that dead ends open up new paths. This is not true. They just have the Bloodglass Shard needed to make a mirror for the map.
Golden chests[ | ]
Finding a gold chest means you are going the right way. These chests only spawn in rooms that are part of the road to the bosses.
Please notice Golden chests can spawn anywhere in the room, so if you find a chest in a room that have multiple paths, just because the chest is closer to one of the paths it does not mean that its the right way.
Room Counting[ | ]
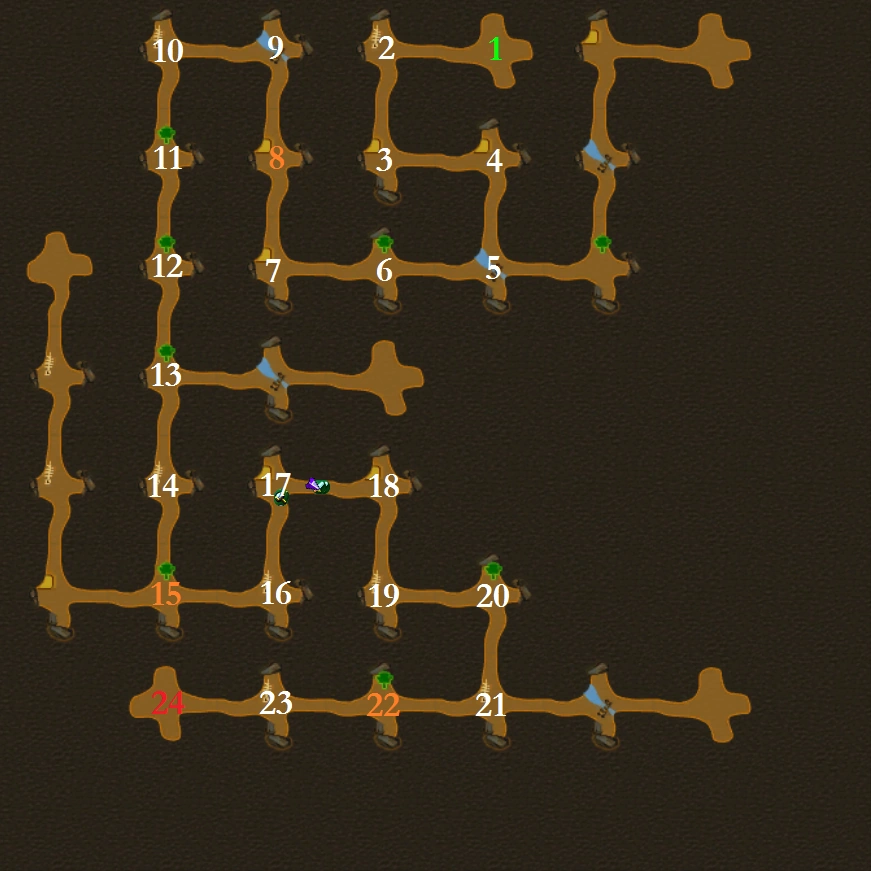
Example of room counting.
The dungeon is randomly generated, but not entirely. By counting every room you go through you can often figure out where to go, or at least know when you have to turn around.
You will encounter each standard boss every 7 rooms.
- Entrance is room 1.
- First standard boss is always in room 8
- Second standard boss is always in room 15
- Third standard boss is always in room 22
- Final boss is either in room 24, 25, or 26.
For example, if you get to room 6 but there is two ways to go, we know the next boss will be in room 8, which means if you do not encounter the boss in 2 rooms ahead, then you can turn around without a worry.
Bloodglass Mirror[ | ]
Having a Bloodglass Mirror in your inventory lets you see the whole maze, however it does not show you where the bosses are. The Mirror can be used in multiple Quicksand Maze dungeons as long it lasts (4 hours). You get the Mirror at the entrance of the dungeon by taking the quest "Bloodglass Mirror" which requires a Bloodglass Shard. Shards could originally only be picked up from Dead End chests inside the dungeon, but now it can also be bought for 3 Lucky Coins at Assistant Wang Tsai in Archosaur.
Dead End[ | ]

Chest found at Dead Ends.
Dead End paths can be anywhere between 1 room to 8 rooms (not confirmed) long.
At the Dead End, you will find a jumping chest. Digging the chest will grant you a Bloodglass Shard (nontradeable), and have a small chance to spawn "Quicksand Bandit", which will drop 10 materials and have the highest rate of all bosses and mobs to drop rare r8rr materials, such as Garan stones and Kunwoo Blades.
If you have a Bloodglass Mirror activated, it is recommended to clear Dead Ends you are able to see that are only 1 room long, to get more shards and a chance of getting bandits.
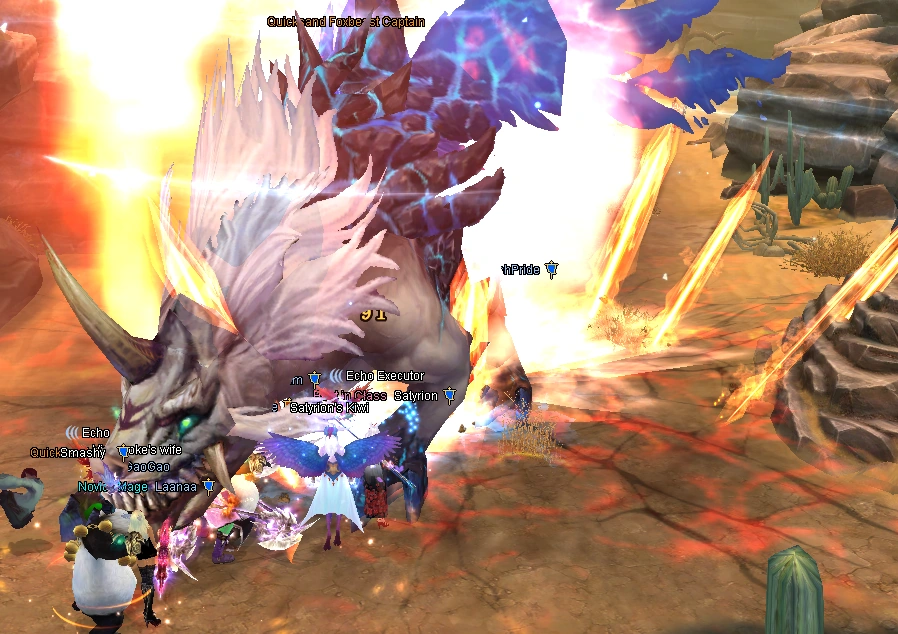
Captains and Monsters[ | ]

Red version of the "1Hit" Captains.
On the way to the bosses, you will encounter a lot of monsters. The majority of monsters are in groups and each group will have one captain, though sometimes two. Captains need to be your main focus. Each captain will have a different skill. If the captain can be stunned, this means the captain will also restore health each time he casts his skill. Exceptions are the captains with healing skills, these captains cannot be stunned. Therefore, stun locking classes are recommended to have in squad, especially if you are low on damage in your squad, to stop the captains from using their skills thus making the captains unable to heal themselves. Captain encounter is random.
Captain skills:
- Quick Heal: High HP recovery speed. Recommended to use Soul Degeneration (Venomancer skill).
- Knockback: Knocks players back.
- Knockup: Knocks players up in the air.
- Expel: Uses AOE purge. Cannot be stunned.
- Heavy Attack: Spams Stun Arrow. Cannot be stunned.


Heavy Attack Captain.
- Spirit or Flee: Untargetable. Stun-able.
- 1Hit (red captain): Single target melee skill that kills you in one hit. Cannot be stunned.
- 1Hit (blue/green captain): Ranged single target skill that kills you in one hit. Stun-able.
- Amplify: Uses an AOE debuff that makes you take more damage. Stun-able.
- DEADLINE: A single target debuff that kills you after a while. Purifying is important. Cannot be stunned.
- Heaven's Flame: Uses an AOE attack and a debuff that makes you take more damage. Stun-able.
- Petrify: Various captains will have this skill. It means it's unable to be stunned. Some captains cannot be stunned regardless of not having this skill.
- THUNDER: Spawns purple pools that deal extremely high damage.
- POISON: Spawn green pool that stacks great poison damage.
- Lava: Spawn red pools that deal high damage and increases the damage taken.
- Lake: Spawn blue pools that ice prison (stuns), increase damage taken, and deal very high damage.
- Pitfall: Spawn brown pools that slow and deal fast medium damage.
For the captains that spawn pools, you can climb the rocks or the walls and the pools will be unable to spawn on you.
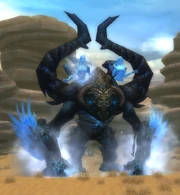
Boss Fights[ | ]

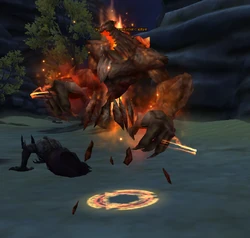
One of the final boss possibilities: Naga Basara.
You will encounter 3 standard bosses and 1 final bosses. Bosses will only spawn if you have killed enough captains and monsters. Check your quest log to see kill count.
Standard bosses possibilities:
- Sand: Ashwing Liondrake
- Sand: Illusionary Blade
- Sand: Trimotion Rakshasa
- Sand: Elemental Offspring
- Sand: Redeye Battlemaster
- Sand: Blinded Evilmaster
- Sand: Darkflame Rotten
- Sand: Corrupted Tortoise
- Sand: Nirvana Sunshooter
Final bosses possibilities:
- Naga Basara
- Aberrant Shura
- Lord of the Labyrinth
You can see the boss mechanics by watching this video: Quicksand Maze Guide.
Materials and Rewards[ | ]
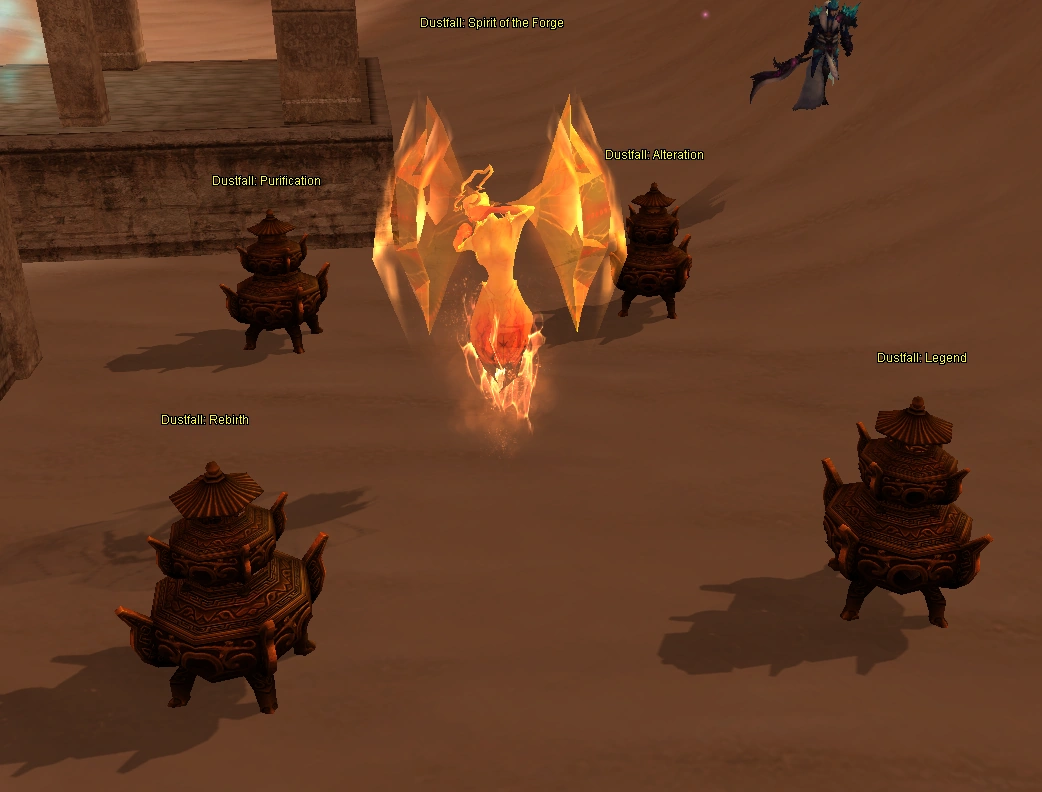

The forges.
Captains, bosses, golden chests and bandits drops Dim materials. These materials have a gray icon and are trade-able, but disappear if you leave the dungeon. You can either right click/double click the Dim materials one by one, or town teleport back to the entrance where the NPC will trade it for the untrade-able version. Only the untrade-able version is used to craft gear.
Outside the dungeon, all forges to the right (near banker) are for R8rr. At the Dustfall:Legend forge you can trade your untrade-able materials into a blue trade-able version (with a fee). It is free to transfer them back to untrade-able.
You can take a shortcut to upgrading your R8r to R8rr by using Dustfall Relic. You need 3 per armor piece and 6 for a weapon. Dustfall Relic can be obtained by chance packs or bought from other players. Re-rolling armor and weapons for different stats still require R8rr materials.
Daily Quest Rewards[ | ]
The daily quest "Whirling Sands (Daily Quest)" gives you a random untrade-able reward:
- 105x Songflow Ringstone (73.9%)
- 4x Strongwind Badge (15.2%)
- 1x Benevolence Seal (7.5%)
- 1x Kunwoo Blade (3%)
- 1x Garan Stone (0.4%)
You don't need to be near the boss when he dies to get quest credit, however you need to be alive.
Videos[ | ]
| Dungeons | |
|---|---|
| The Midlands |
|
| Call to Duty | |
| Lothranis and Momaganon | |
| Morai | |
| Primal World | |
| Celestial Vale | |
| The Western Steppes | |