
Twilight Temple Revisited Part 1 is the first mode of the Twilight Temple Revisited dungeon located near the Town of Arrivals in the Midlands. It is available to level 100+ players who have reawakened twice with a boundary of Shifting Sky I or higher. It is part of the 4th chapter of Twilight Temple known as Rhapsody of the Revived, but is located in a separate dungeon; the location for Twilight Temple Revisited is opposite of the original Twilight Temple. Players can also teleport to Twilight Temple Revisited through the Illusion Stone in Archosaur for 20,000 Silver Coins. In this dungeon, players can obtain materials for the first two casts of Twilight Warsoul Gear, Twilight Souls, and Warsoul Gems required for the Warsoul Repository.
Twilight Temple Revisited Part 1 is a required dungeon for Faction Goals for the Faction Base. Squads with 2 or more faction members can also earn Chivalry Points and Loyalty Funds when completing the dungeon.
Story[ | ]
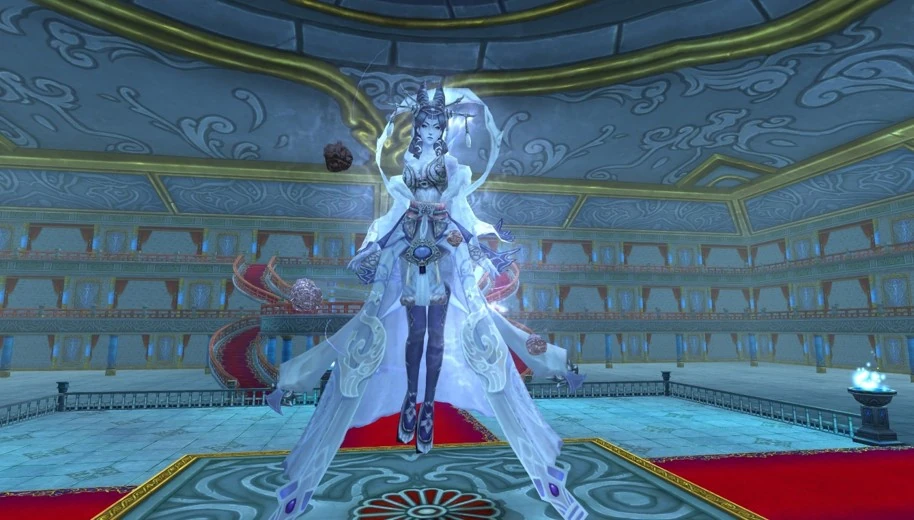
A thousand years ago, the once powerful Twilight Empire fell in the wake of destruction of an ancient demon released from imprisonment. The tragedy left only one survivor of the royal bloodline: The Moonlight Princess, who has recently returned from exile to oversee the ruins of the Twilight Temple. She now seeks out powerful warriors to aid her in a fighting a new evil that threatens the last remnants of an era she once called home.
Maps[ | ]
The map for Twilight Temple Revisited is separated into 3 parts, though only 2 of these parts are currently accessible. The second part of the map is located east of Illusion Lord Armageddon's room.
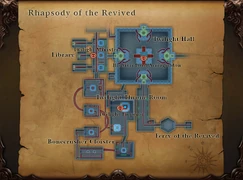
The first part of the map, where most of the dungeon takes place.
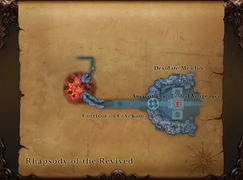
The second part of the map where players fight the final boss.


Entry[ | ]
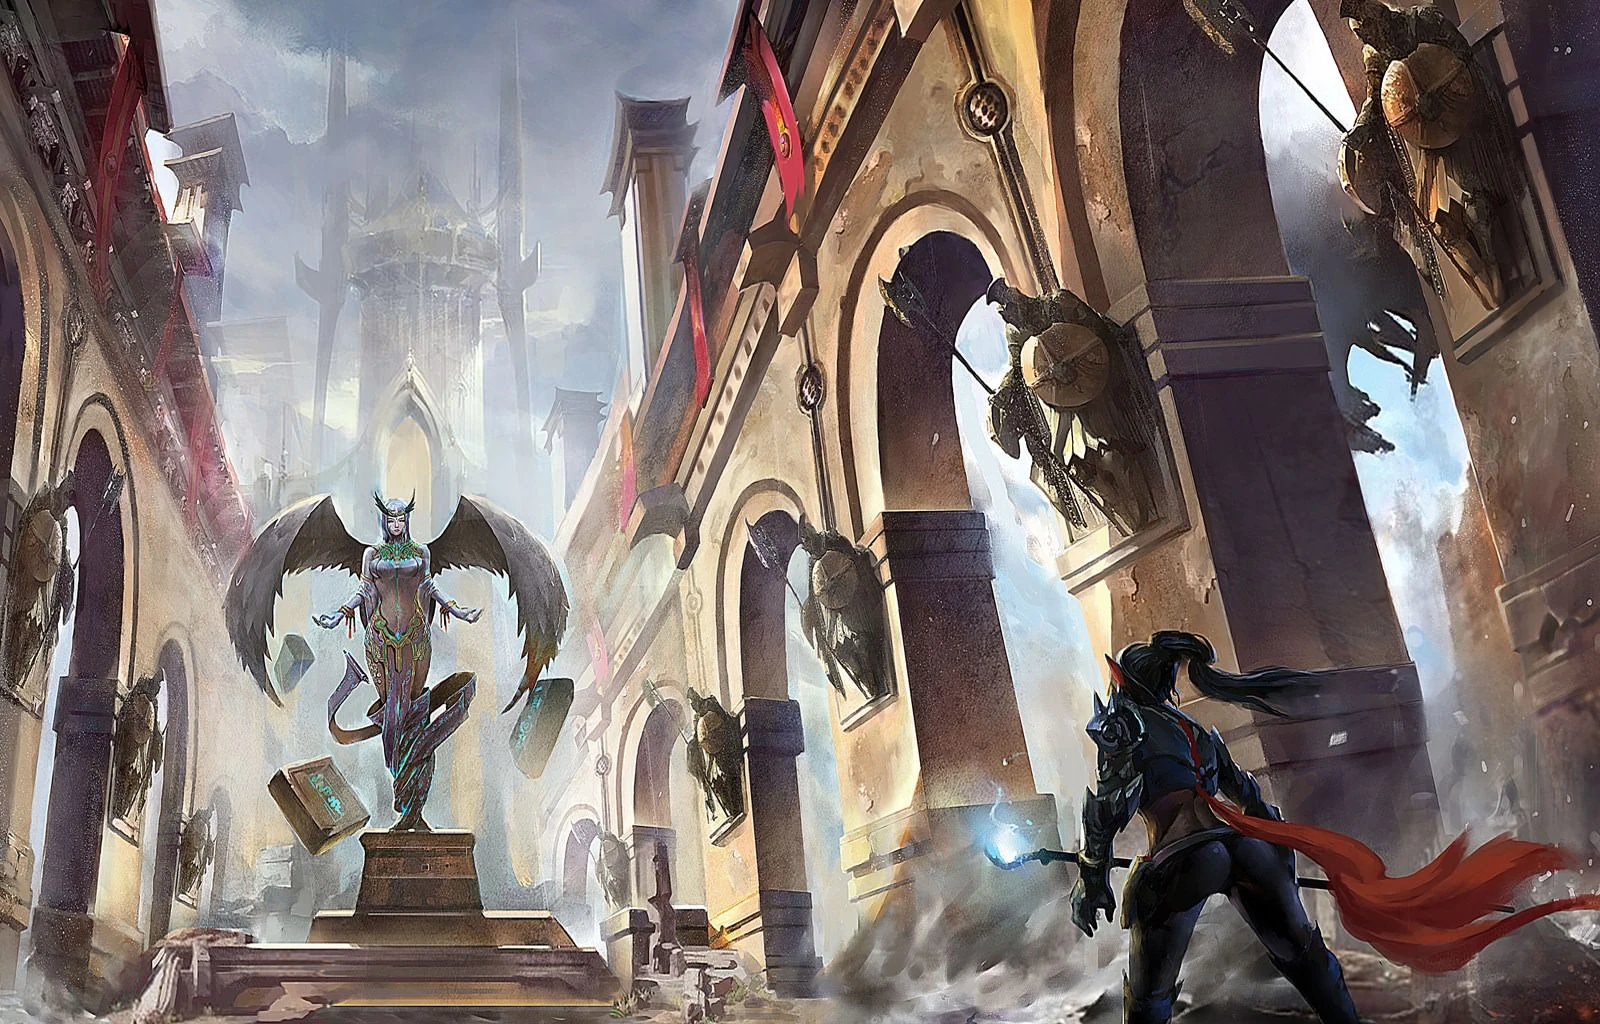

Concept art for Twilight Temple Revisited.
Players can enter the dungeon without the use of an item, however will need a Relic of Wonder: Armor to start the dungeon or teleport into the main part of the dungeon. A Relic of Wonder: Armor can be picked up once per day from the Streams Order Envoy inside the dungeon, or through the Faction Base if the Ticket Vendor Faction Talent has been activated.
Players can get 5 Sealed Moon Ode Orders for free from the Expedition quest line that starts in Sundown Town. Sealed Moon Ode Orders do not have an expiry and can be used to redeem 24-hour Moon Ode Orders, which are automatically turned into Relics of Wonder: Armor. Tradeable Sealed Moon Ode Orders used to be obtainable through the Twilight Wraiths daily event that occurs from 4pm to 10pm server time; these will automatically convert into permanent Relic of Wonder: Armor.
The squad leader can activate the dungeon by taking the "Activate Rhapsody of Revive I" from the pillar in the entrance area of the dungeon. Squad members can then teleport into the main part of the dungeon using the pillar. The squad should then gather around while the squad leader talks to Master Thief Inna Woo inside to fully activate the dungeon.
Rewards[ | ]
Once per day, players will receive a daily quest named Twilight Library upon entering the instance. To complete this quest, players will need to kill Lethal Vengeance, the final boss
Completing this quest will give the following rewards:
- 10 Twilight Repair Powder
- 1 Slumbering Royal Spirit (chance, random which one)
Squad Structure[ | ]
10 squad members are required to activate the dungeon.
The following classes are ideal for Twilight Temple Revisited, though not all are essential:
- Barbarian: The first two bosses, Twilight Emperor and Twilight Minister, have attacks that only barbarians can tank.
- Cleric or Mystic: These are essential mostly for resurrecting as many of the bosses will instantly kill players. Mystics are ideal due to their resurrect buff.
- Debuffers: Blademasters, Seekers, Stormbringers, Venomancers
Twilight Throne Room[ | ]
Once the dungeon has been activated by the squad leader, players can talk to the pillar inside the starting room to teleport to the Ferry of the Revived. From this point, players need to make their way towards the Twilight Throne Room while following the Princess of Moonlight, an NPC who will guide the players through the dungeon.
On the way to the Twilight Throne Room, players will encounter a number of monsters including the Soulbanisher who has the ability to paralyze players, indicated by a blue rectangular light on the floor. Players will also encounter Soulbanisher Summoners who are patrolling the area on their own, but will summon other monsters when attacked. Of particular note are the Revived Head Hunters, which will instantly kill anyone who has less than 35% health.
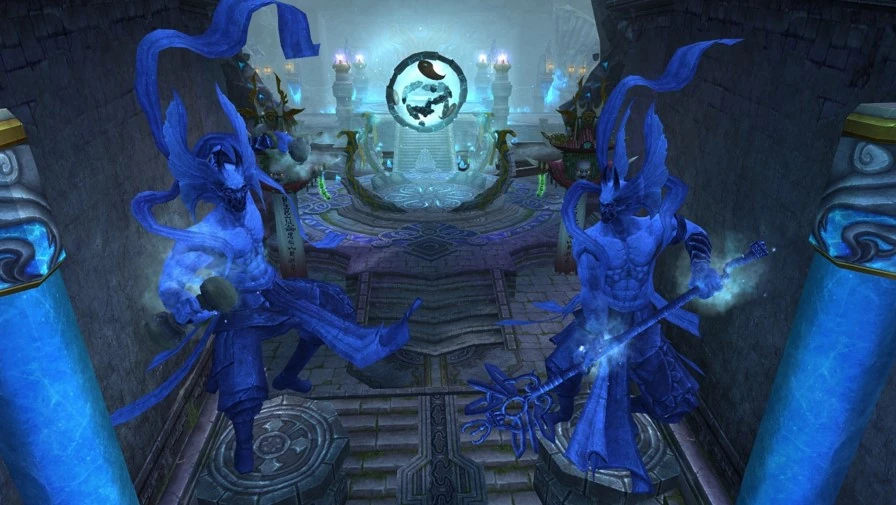
Players will also pass the Twilight Hall where Illusion Lord Armageddon is. If players attempt to make their way to the Illusion Lord, they will begin to take constant damage. If they get too close they will be instantly killed even if they use an immunity potion or immunity skill. A line of green light around the edges of the room indicate where players should not step over to avoid being killed.
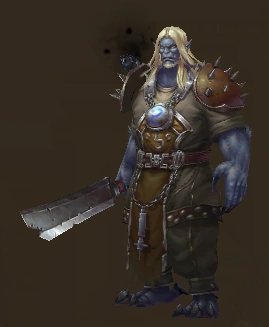
Twilight Emperor[ | ]
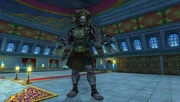
Twilight Emperor Tsang.
The revived Twilight Emperor has lost all his humanity, and gained new unnatural power. The Twilight Emperor will be waiting in the Twilight Throne Room, along with two Revived Head Hunters (see earlier note). He has a passive skill, Normal Attack Defense, which is triggered when taking damage from auto-attacks causing the boss to reduce the damage he takes for a short time.
The Twilight Emperor will deal high damage to classes that are not barbarians via the passive skill Emperor's Power, so it is advised to have a barbarian tank the boss. Every 20 seconds, the Twilight Emperor will stun all nearby players and reset aggro via the Cry of Heaven skill, which will likely cause the boss to change targets. Every 45 seconds, the boss will also cast Emperor Tsang's Wrath, a debuff that reduces the squad's attack by 20% for 30 seconds. When the Emperor's HP is lower than 50%, this debuff will be enhanced.
The boss will also summon three Bloodthirst Zombies which will chase random players; the targeted players will see a red eye symbol above their head. The targeted players should run from the Bloodthirst Zombies to avoid being hit or they will take critical damage. A zombie will disappear once its targeted player dies. Note that these zombies can still chase players and kill them even after the Emperor is dead.
Once the Twilight Emperor is dead, the Princess of Moonlight will guide the players to the next part of the dungeon.
Drops[ | ]
The Twilight Emperor will drop a total of 30 items.
| Item | Chance |
|---|---|
| 0.3667% | |
| 3.6667% | |
| 7.3333% | |
| 0.8333% | |
| 0.8333% | |
| 0.8333% | |
| 0.8333% | |
| 85.3000% |
Bonecrusher Cloister[ | ]
The Bonecrusher Cloister is an area south of the Twilight Throne Room. Players will be required to work together to navigate a maze of serpentine corridors while in stealth.
The squad leader can talk to the Princess of Moonlight to receive a squad buff that will put all players in stealth. The area of effect of the stealth buff is indicated by a blue circle on the ground. The center of the buff will be given to a random squad member for 20 seconds. The player that becomes the center of the stealth buff will be engulfed in light. After 20 seconds, the buff will transfer to another player for 20 seconds. This process will be repeated until all squad members have been the center of the buff at least once, leaving players with only a short time of 3 minutes and 30 seconds to reach their destination. If a player who has not been the center of the buff dies during this part of the dungeon, it will reduce the total time that the squad is placed in stealth.
If a player leaves the stealth circle, they will become visible and are likely to be killed instantly by the nearby monsters. If three or more players are killed, this phase will automatically fail causing every squad member to die. If the squad fails, the squad leader can begin the trial again from the Princess of Moonlight.
While navigating through the Bonecrusher Cloister, players will encounter Revived Mirage Guards. These guards do not move and have a large circle of range around them but will not see stealthed players unless they get very close to them. Players will also encounter patrolling Soulbanish Observers which move around. These monsters are capable of spotting stealthed players if anyone steps in their range, which is indicated by a purple circle around them. If this happens, Soulbanish Observers will kill everyone. Players will also have to avoid the Ghost Claws that spawn from the floor in corridors. If a player is hit by a Ghost Claw, it will deal damage to them and another one will spawn. If not careful, this can easily lead to being overwhelmed by them. A common strategy to overcoming this trial is for the squad members to put the squad leader or an experienced player on follow to make sure everyone stays close to each other and follows the correct path.
Revived Reaper[ | ]

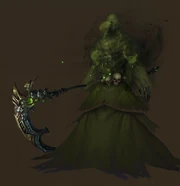
Revived Reaper
The players will eventually reach a room where they will find the Revived Reaper, which they have to kill in order to proceed. This is a mini-boss and it has a passive skill, Normal Attack Reduction, which is triggered when taking damage from auto-attacks causing the boss to reduce the damage he takes for a short time. The Revived Reaper will summon monsters when he is attacked. Once engaged in combat, players are not allowed to leave until the Revived Reaper and his monsters are killed. Leaving the room and causing the monsters to reset (leave combat mode) will result in the trial automatically failing, and all players will be killed.
Periodically, the Revived Reaper will pull all players to him via Soul Lock and follow up with a strong skill, Reaper, that deals a great amount of physical damage to all players within a fan-shaped area in front of it, reducing their HP by 60%. Ranged players should stand on the staircase away from the boss to avoid being pulled into the attack.
When the Revived Reaper dies, the Bonecrusher Cloister phase will end and all monsters throughout the cloister will disappear. Players that died during the stealth trial can now revive and safely travel through the cloister. The Princess of Moonlight will also activate a shortcut so players won't have to go through the corridors again. The shortcut is found in the room after the Twilight Emperor and goes all the way to the room after the Revived Reaper.
In the room after the Revived Reaper, there is a chest which contains Twilight Souls and Twilight Repair Powders.
Drops[ | ]
The Bonecrusher Cloister Hoard will drop a total of 20 items.
| Item | Chance |
|---|---|
| 2.5% | |
| 2.5% | |
| 2.5% | |
| 2.5% | |
| 90% |
Library[ | ]
The Princess of Moonlight will guide the players to the Library, located north of the Bonecrusher Cloister, to find the Twilight Minister. The Library is also where players can find the Book of the Dead for their Expedition quest line.
Twilight Minister[ | ]
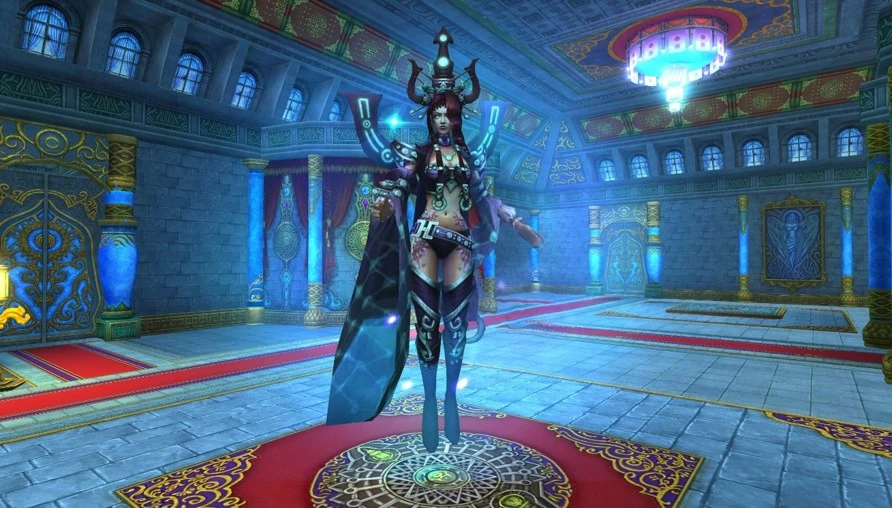
Twilight Minister Tsu.
The revived Minister Tsu is manipulated by an unknown power. She will gradually regain her own consciousness, reducing her threat to players. Maybe there is a way to save her?
When fighting the Twilight Minister, the squad has the option to kill her or save her which affects the type of chest she drops. If players choose to kill her, she will drop a Slumbering Secret Hoard which does not include her gold material required for the Twilight Warsoul boots. If they choose to save her instead, she will drop an Awakened Secret Hoard instead which includes slightly more items and the chance of dropping her gold material.
The Twilight Minister has a passive skill, Normal Attack Defense, which is triggered when taking damage from auto-attacks causing the boss to reduce the damage she takes for a short time. She will deal high damage to classes that are not barbarians and occasionally do a cone-shaped attack that kills any non-barbarians, so it is advised to have a barbarian tank the boss.
Periodically, she will put all players nearby to sleep for 20 seconds via Dream Realm. The Sleep effect can be purified or removed when players are attacked through the various skills the boss has. Ghost Claws (which deal damage equal to 40% of max HP and summon a duplicate upon hitting) will commonly spawn under players shortly after they have been put to sleep via Summon Ghost Claw. It is advised to use anti-stun skills or have the Faith Genie skill in the event that Ghost Claws appear under the player while slept. Mystics should use their ΨVital Herb with an Ethereal Glyph to purify the squad.
While fighting the Twilight Minister, a yellow area covering the north, south, or central area will appear that players should avoid. After 3 seconds a Gigantic Monstrous Claw will appear from the wall in the yellow area and constantly attack for 15 seconds, dealing damage equal to 20% of a player's maximum HP. Ghost Claws will lurk underground, striking 3 seconds after their red circles appear on the ground, dealing damage equal to 40% of the player's maximum HP. This attack can wake up sleeping players. If a Ghost Claw hits a player, an additional group of Ghost Claws will spawn. If not careful, players might quickly become overwhelmed by them.
Twilight Minister additionally has the Shriek AoE attack skill, which deals significant damage to the squad.
If players choose to not save the Twilight Minister, the squad can kill her as normal. As she loses health she will stop using certain attacks on the squad. Once she is below 3 million health she will become immune and stop attacking players altogether. She will eventually die and drop the Slumbering Secret Hoard.
Saving Twilight Minister[ | ]
To save the Twilight Minister, it is recommended to have a barbarian hold the boss for the duration of the fight. Optionally the squad can also have 1 or 2 squad members stay behind so the boss does not reset if the barbarian dies before the end of the battle. The Twilight Minister will use the same mechanics listed above for the duration of the fight, though squad members will only mainly have to deal with Ghost Claws constantly spawning.
On the west side of the room are 3 closed doors. The barbarian should pull the Minister to one of these doors and have her facing it. Eventually she will use her cone-shaped attack which is lethal to non-barbarians and if the door is in range, the Minister will crack it. Once she hits the door a second time with the cone-ranged attack the door will open and the squad will unlock the secret mode which can save the Minister. The Twilight Minister will be immune to all damage from this point onward and will continue to spawn Ghost Claws and attack areas in the main room, so the barbarian should stay behind in the main room and work on breaking the other 2 doors while the rest of the squad works on the enemies inside the library.
As each door is broken an enemy will spawn in the room behind the door. Each one has 16.38 million health and can only be attacked from a maximum range of 8 meters so players will need to stand close to them. Each enemy also has a special effect which players must avoid to avoid dying or taking damage:
- The south room will spawn Into the Gate: Entropy. It will occasionally use a cone-shaped attack that kills any player standing in it. Avoid the cone.
- The central room will spawn Into the Gate: Vane. It will spawn beetles with purple circles on the ground that move around and deal large damage to players. Avoid the beetles.
- The north room will spawn Into the Gate: Burst. It will spawn a large purple circle on the ground within the 8 meter attack range that eventually explodes. Move out of the area when it spawns.
Once all 3 enemies have been killed, the Twilight Minister will be free from manipulation and will disappear. An Awakened Secret Hoard will spawn which has a chance of containing her gold material.
Drops[ | ]
If players do not save the Twilight Minister, a Slumbering Secret Hoard will spawn after she dies. The Slumbering Secret Hoard will drop a total of 24 items.
| Item | Chance |
|---|---|
| 4.5833% | |
| 9.1667% | |
| 1.0417% | |
| 1.0417% | |
| 1.0417% | |
| 1.0417% | |
| 82.0833% |
If players save the Twilight Minister, an Awakened Secret Hoard will spawn instead after the battle. The Awakened Secret Hoard will drop a total of 30 items.
| Item | Chance |
|---|---|
| 0.3667% | |
| 3.6667% | |
| 7.3333% | |
| 1.6667% | |
| 1.6667% | |
| 1.6667% | |
| 1.6667% | |
| 81.9667% |
Twilight Hall[ | ]
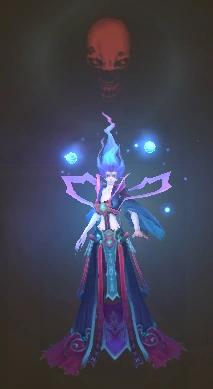
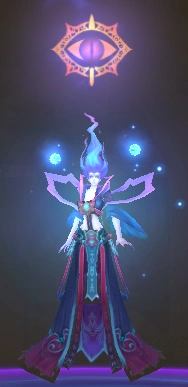
Once the Twilight Minister has been killed, the Princess of Moonlight will note that Minister Tsu run away. If she was saved instead, the Princess will say nothing. After this, she will guide the players to the Twilight Hall where they will encounter the Illusion Lord. The Twilight Hall is surrounded by enemies that will not attack players. It is safe to approach the Illusion Lord as the barrier that would previously kill players has been removed.
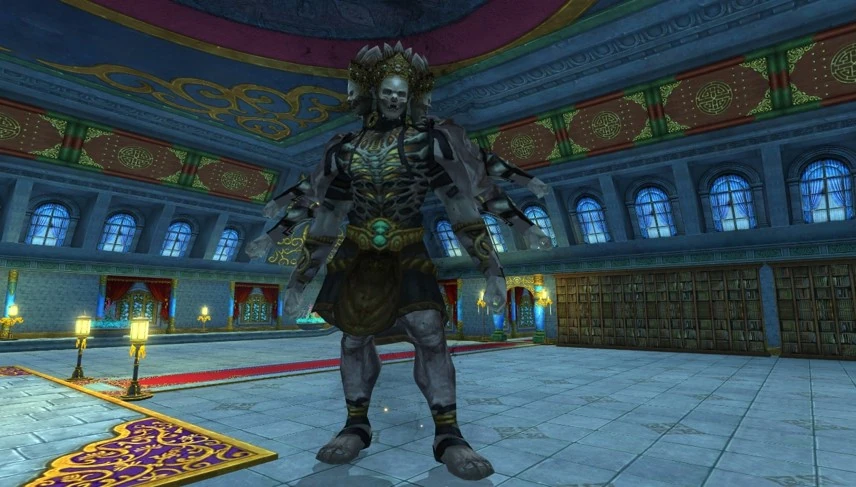
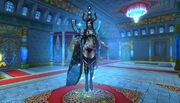
Armageddon[ | ]

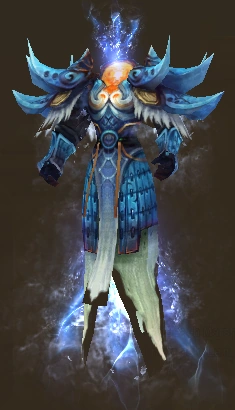
Illusion Lord Armageddon.
The Illusion Lord has a passive skill, Normal Attack Reduction, which is triggered when taking damage from auto-attacks causing the boss to reduce the damage she takes for a short time. Periodically, she will debuff players via Mana Vapor around a randomly chosen target with a debuff that burns Mana at a fast rate. This debuff can be purified. A few seconds later the boss will instantly kill any players that have less than 50% Mana via Soul Nail, so it is recommended to purify the skill quickly or use a Spirit Charm (MP Charm). Occasionally, the Illusion Lord will target a random player and kill them instantly after a short period of time via Armageddon Slayer.
When the Illusion Lord has less than 50% HP, she will disappear and start the Illusion Matrix which traps all players inside a small room surrounded by four Celestial Illusions. These Celestial Illusions have a deadly attack that will instantly kill all players caught in their path via Ultimate Elimination (Left), Ultimate Elimination (Right), and Death Breath. They will attack in the direction they are facing either to the left, the right, or in the center, as indicated by spikes coming from that direction near their head. Celestial Illusions that have been already killed may still perform this deadly attack.
The attack of the Celestial Illusions is indicated by pillars that appear on the walls if it is to their left or right. When the Celestial Illusion glows, it indicates the path of her attack will be through the center of the room. A purple light will appear on the floor when the attack is launched. At first only one Celestial Illusion will attack at a time, though this will increase to two Celestial Illusions and eventually all four will attack. The area that they attack is random; when all four attack they may attack everywhere but the middle, everywhere but the corners, or in random places so players must watch out for pillars or glowing light at all times.
Players need to kill all four Celestial Illusions as fast as possible in other to avoid these deadly attacks and escape the Illusion Matrix. Once all Celestial Illusions have been killed, they will disappear and the Illusion Lord will appear again and can be killed. Once she is killed, an Illusion Lord Hoard will drop.
Drops[ | ]
The Illusion Lord Hoard will drop a total of 30 items.
| Item | Chance |
|---|---|
| 0.3667% | |
| 3.6667% | |
| 7.3333% | |
| 1.6667% | |
| 1.6667% | |
| 1.6667% | |
| 1.6667% | |
| 81.9667% |
Desolate Meadow[ | ]

The statues of the Desolate Meadow and the Wheel of Fate.
Upon killing the Illusion Lord the statue of the Twilight Hall will appear, emitting a trail of light guiding players to the east to an area connected to the Twilight Temple. The Desolate Meadow is a hidden area connected to the underworld. Just beyond the entrance, players will find a mini-boss called Shengjie's Spiritual Armor. It is a set of armor possessed by General Wurlord's spirit and guards the path to the Desolate Meadow. The mini-boss is not very strong but it has the ability to summon multiple clones of itself via Shadow Image, similar to General Wurlord in other modes of Twilight Temple. It additionally has a linear AoE attack, Dragon Break.
Past the mini-boss is an area with lava which can kill players if they fall into it. Players can get to the next room by standing in the pink light at the entrance to this room. They will eventually be launched through the air to the entrance to the Desolate Meadow. On rare occasions players may be launched into the lava which will instantly kill them. There is no way to get back to the main parts of Twilight Temple once passing this point unless players jump into the lava and die.
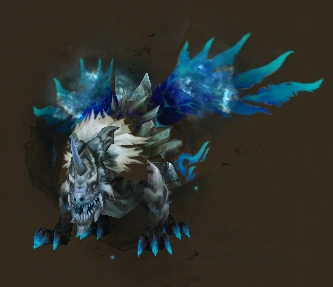
Further ahead, small parts of the ground will raise up and can damage players so they should be careful to avoid these. Ahead they will encounter the Dark Colluseast and the Soulripper. These mini-bosses cannot be individually lured as they will both eventually attack the squad.
Periodically, the Dark Colluseast will spit magma in a fan-shaped area in front of it dealing constant fire damage via Burning Breath. Any player that is caught up in the Soulripper's attack while suffering from fire damage will die instantly. Similarly, the Soulripper will periodically attack with an icy rain in an area within 10 meters causing players to receive constant water damage via Absolute Zero. Any player that is caught up in the Dark Colluseast's attack while suffering from water damage will die instantly. The squad should split in two and fight the two beasts separately, making sure that the two of them are never close to each other.

Shengjie's Spiritual Armor
Dark Colluseast
Soulripper
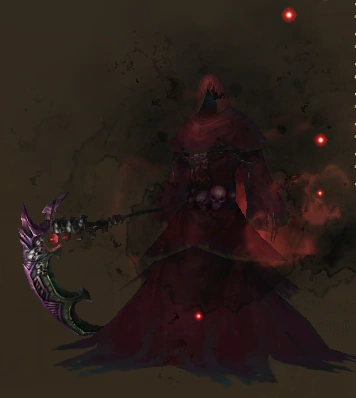
Lethal Vengeance[ | ]
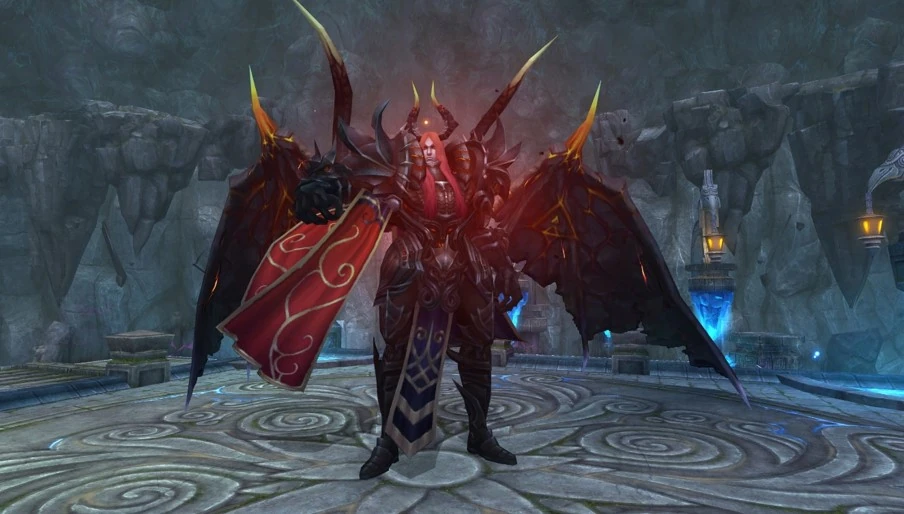

The Ancient Demon Lethal Vengeance.
After defeating the two beasts guarding the Wheel of Fate, any player in the squad can talk to the Princess of Moonlight and take her quest to eventually spawn the final boss, Ancient Demon Lethal Vengeance. He has a passive skill, Normal Attack Defense, which is triggered when taking damage from auto-attacks causing the boss to reduce the damage he takes for a short time. Periodically, the Lethal Vengeance will attack all players within a large range and interrupt their channeling via Explosive Hex. He will also target a random player, dealing damage while inflicting a bleeding effect via Demonic Raven.
The Lethal Vengeance will summon White Cloak Archers via Revived White Cloak throughout the battle who will constantly attack players in the battlefield. These Archers are invincible; they cannot be targeted or killed. Additionally, the boss will ummon Demonic Flames and Demonic Tornadoes. These will appear on one melee player and two ranged players at random. Demonic Flames are red circles that will instantly kill any players that stand in them, while Demonic Tornadoes are blue circles that will pull players into the center of them if they stand in them.
As the battle goes on, this Ancient Demon, as well as the creatures it summoned, will become stronger and stronger. In the meantime, the Wheel of Fate will bless all players inside its effect range via Force of Fate, increasing the damage they deal by 50% once per 10 seconds. The players can gain 10 layers of this effect, while the demons can get up to 50 layers.
The Lethal Vengeance has a lot of HP and the battle will be long, but players can use the power of the Wheel of Fate to rewind the time back to when the battle first started. In order to activate the Wheel of Fate, a player will have to run to it and dig it, casting Nirvana of Fate. The effect of rewinding will activate immediately after it is dug. Using the Wheel of Fate to rewind time will cause all Demonic circles and White Cloak Archers to disappear, and Lethal Vengeance's HP will be not restored giving players a better chance to kill him. When rewinding back time, any player that had died will be resurrected with buffs and full chi, and players will be standing where they originally stood at the beginning of the fight. The Wheel of Fate can be used up to 3 times before disappearing.
After Ancient Demon Lethal Vengeance dies, Master Thief Inna Woo will spawn and can sell players a maximum of 10 Caskets of Innocence for 10 gold each. Players can leave the dungeon through Tsuan who spawns alongside Inna Woo.
Drops[ | ]
Lethal Vengeance will drop a total of 30 items. He will also drop a Wheel of Fate Shard.
| Item | Chance |
|---|---|
| 0.3667% | |
| 3.6667% | |
| 7.3333% | |
| 2.5% | |
| 2.5% | |
| 2.5% | |
| 2.5% | |
| 0.8333% | |
| 0.8333% | |
| 0.8333% | |
| 0.8333% | |
| 0.0333% | |
| 75.2667% |
Gallery of Monsters[ | ]
Soulbanisher
Soulbanish Summon
Soulbanish Observer
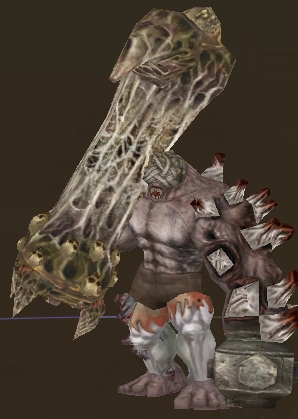
Revived Twilight Brute
Revived Head Hunter
Shattered Dream Raptor
Masterless Phantom
Revived Mirage Guard

.jpg)
Videos[ | ]
- Twilight Temple Revisited Walkthrough
- Illusion Lord Armageddon Strategy Guide
- Solo Run by Someone With An Ego Who Sped Their Video Up by 33% (playback at 0.75x for real speed)
| Dungeons | |
|---|---|
| The Midlands |
|
| Call to Duty | |
| Lothranis and Momaganon | |
| Morai | |
| Primal World | |
| Celestial Vale | |
| The Western Steppes | |