
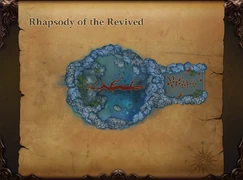
Twilight Temple Revisited Part 2 is the second mode of the Twilight Temple Revisited dungeon located near the Town of Arrivals in the Midlands. It is available to level 100+ players who have reawakened twice with a boundary of Pious Sky I or higher. It is part of the 4th chapter of Twilight Temple known as Rhapsody of the Revived, but is located in a separate dungeon; the location for Twilight Temple Revisited is opposite of the original Twilight Temple. Players can also teleport to Twilight Temple Revisited through the Illusion Stone in Archosaur for 20,000 Silver Coins. In this dungeon, players can obtain materials for the third cast of Twilight Warsoul Gear, Twilight Souls, and Moonlight Crystals to use with Twilight Souls.
Twilight Temple Revisited Part 2 is a required dungeon for Faction Goals for the Faction Base. Squads with 2 or more faction members can also earn Chivalry Points and Loyalty Funds when completing the dungeon.
Story[ | ]
The continuation of the Rhapsody of the Revived chapter tells the story of the Princess of Moonlight's escape into the secret passage. After restoring the sanity of the Twilight Minister, she finally remembers her other identity as Tsuan, the daughter of Ien the Arbor, one of the Four Winged Elf Lords. Aware of the secrets of the Twilight Empire and the Princess of Moonlight's plot, Tsuan opened the door of the secret passage and lead the warriors of Perfect World into the depths of the passage. At the end of the secret passage, a brand new, magnificent capital named Cloud Abode is revealed to the warriors.
After the original Twilight Empire was destroyed, the Princess of Moonlight never forgot the identity of the royal family and their goal. She vowed to rebuild the Twilight Empire and reproduce the glory of the past. To this end, she was willing to use the devil's power to create this magical world. However, the restoration of the Twilight Empire cannot be accomplished by just one person. She skillfully tricked the warriors of Perfect World to help her reactivate the Wheel of Fate, resurrecting Chungyun. She also revived the four Winged Elf Lords to use as her puppets.
The conspiracy of the restoration of the Twilight Empire has surfaced, and Perfect World once again has fallen into the whirlpool of terror.
Maps[ | ]
The map for Twilight Temple Revisited Part 2 is separated into 2 parts. The second part of the map is located to the east of the first map.
The first part of the map, where the entrance is located.

The second part of the map, where the main dungeon is located.

Entry[ | ]
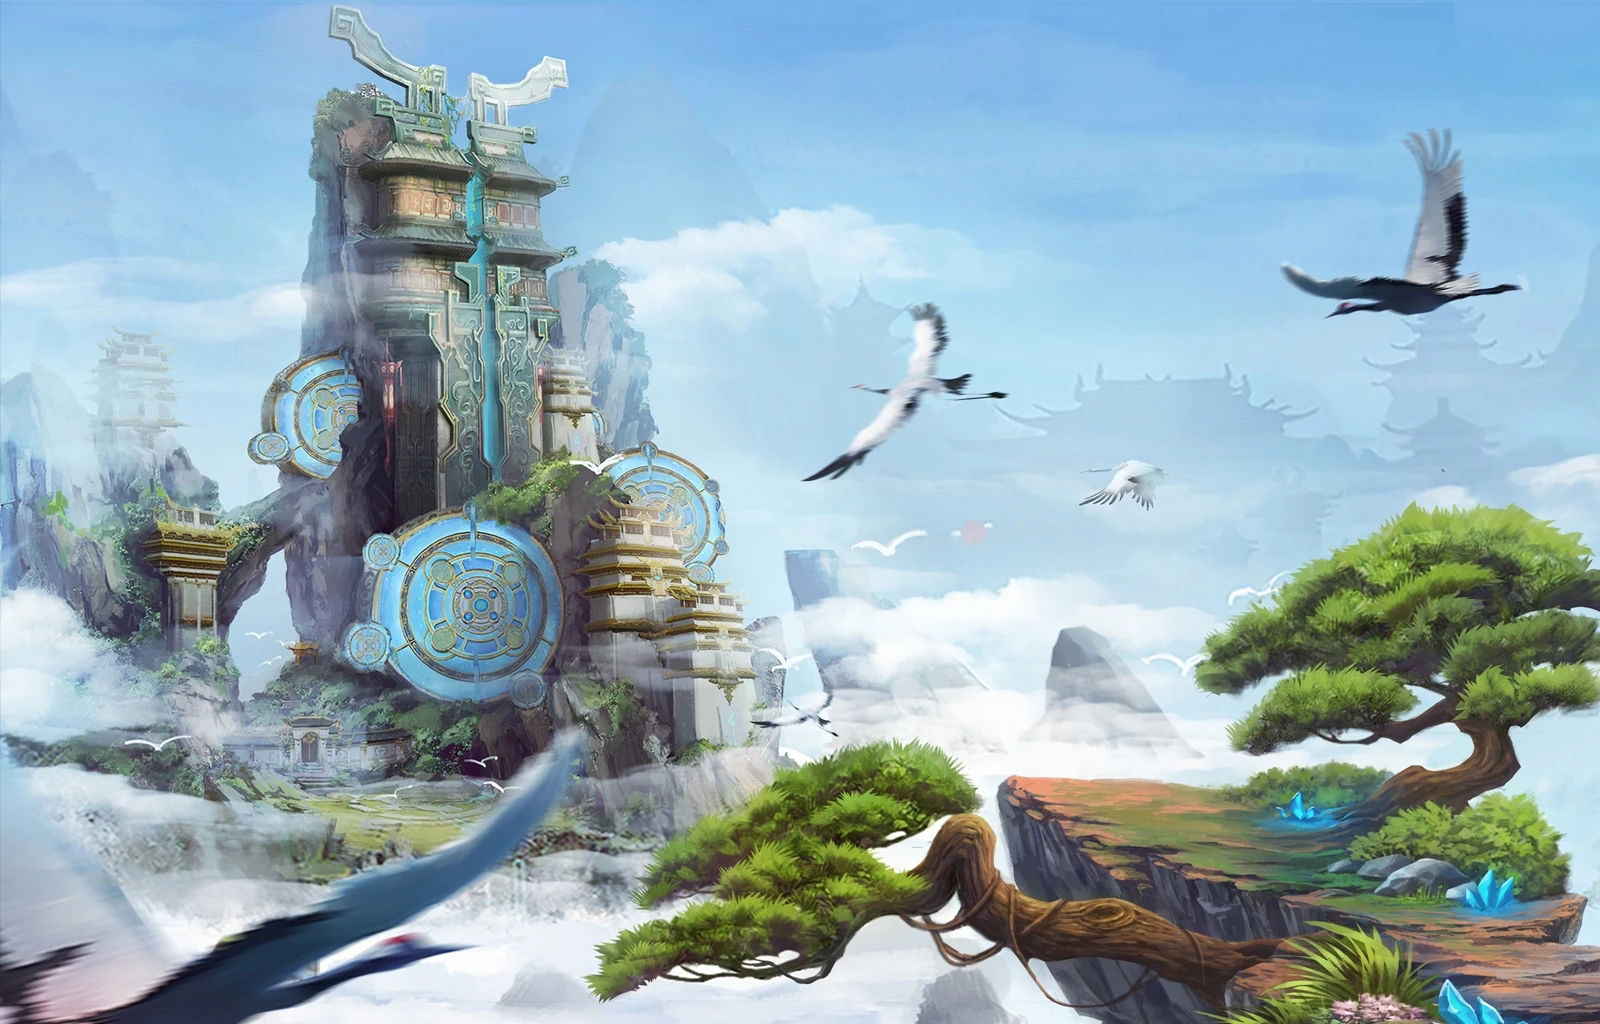

Concept art for Cloud Abode.
Players can enter the dungeon without the use of an item, however will need a Relic of Wonder: Armor to start the dungeon or teleport into the main part of the dungeon. A Relic of Wonder: Armor can be picked up once per day from the Streams Order Envoy inside the dungeon, or through the Faction Base if the Ticket Vendor Faction Talent has been activated.
Players can get 5 Sealed Moon Ode Orders for free from the Expedition quest line that starts in Sundown Town. Sealed Moon Ode Orders do not have an expiry and can be used to redeem 24-hour Moon Ode Orders. Tradeable Sealed Moon Ode Orders used to be obtainable through the Twilight Wraiths daily event that occurs from 4pm to 10pm server time; these will automatically convert into permanent Relic of Wonder: Armor.
The squad leader can activate the dungeon by taking the "Activate Rhapsody of R. II" from the pillar in the entrance area of the dungeon. Squad members can then teleport into the main part of the dungeon using the pillar.
Rewards[ | ]
Once per day, players will receive a daily quest named Cloud upon entering the instance. To complete this quest, players will need to kill either Shining Twilight Treasure or Dull Twilight Treasure, the item chest which drops from the final boss Completing this quest will give the following rewards:
- 10 Twilight Repair Powder
- 1 Slumbering Sacred Spirit (chance, random which one)
Squad Structure[ | ]
10 squad members are required to activate the dungeon. The squad should consist of both physical and magic damage dealers as some bosses are immune to certain types of damage.
There are certain classes which are essential to kill bosses:
- Barbarian: The first boss, Illusion Nemen, has an attack that only barbarians can tank. Other classes can tank the attack with a well-timed immunity, though it is safer having a barbarian.
- Cleric or Mystic: These are essential as many of the bosses can instantly kill players. A mystic is very useful especially at the final boss, where players must avoid dying to succeed.
- Venomancer: Feather Lord has a healing buff that must be purged. The cooldown for Purge will instantly reset if used at the right time, so one venomancer should be enough.
- Classes that can use knockbacks or reel ins: Psychics, Barbarians, Archers, Blademasters, Stormbringers, etc. Yi the Mighty Wing and Yi the Earthquake spawn objects that must be pushed back/pulled in to a specific area.
There are also classes which aren't essential but can make the run go a lot faster:
- Debuffers: Blademasters, Seekers, Stormbringers, etc.
- Classes that can use attacks-per-second (APS) gear: Feather Lord has a shield that can be removed by hitting it 40 times, which can be done quicker with classes using APS gear (Assassins, Blademasters, Archers, etc).
Crimson Palace[ | ]


Mad Sword Guardian
Once the dungeon has been activated by the squad leader, players can talk to the pillar inside the starting room to teleport to the Desolate Meadow, where Twilight Temple Revisited Part 1 ends. Once all players are in the Desolate Meadow, the squad leader can talk to Tsuan to start the dungeon. She will guide players through to the first room, along the fallen tree bridge, and through the waterfall into the second room which has swiping skeletal hands that players should avoid.
This second room is guarded by a Mad Sword Guardian as well as White Cloak Bladesmen and White Cloak Archers. The White Cloak Archers can purge players with a cone-shaped AoE via Nail Rain; this skill does not benefit from Dark Honor. As each of the ninety-nine White Cloak is killed, the remaining ones throughout the rest of the dungeon will get stronger via Dark Honor. The Mad Sword Guardian will jump to players at random via Leap Slash, leaving black Rune Traps on the ground as he lands, which players must avoid. The final hit of Leap Slash is enchanced via Leap Smash and will knock players back. Rune Traps take 4 seconds to prime, at which point any player within will be killed by the White Cloaks.
After clearing the room, players will be able to continue through and will be taken outside to the Cloud Abode. Continue forward to find more White Cloaks and a couple of Lehron. The Lehron can heal itself using its physical attacks via Bloodthirst and will debuff a random player with a physical Damage-over-Time (DoT) skill via Thirsty Syphon. After clearing the monsters, continue along the path to reach the Crimson Palace, where the Illusion Nemen can be found up on the platform.

White Cloak Bladesman
White Cloak Archer
Lehron


Illusion Nemen[ | ]

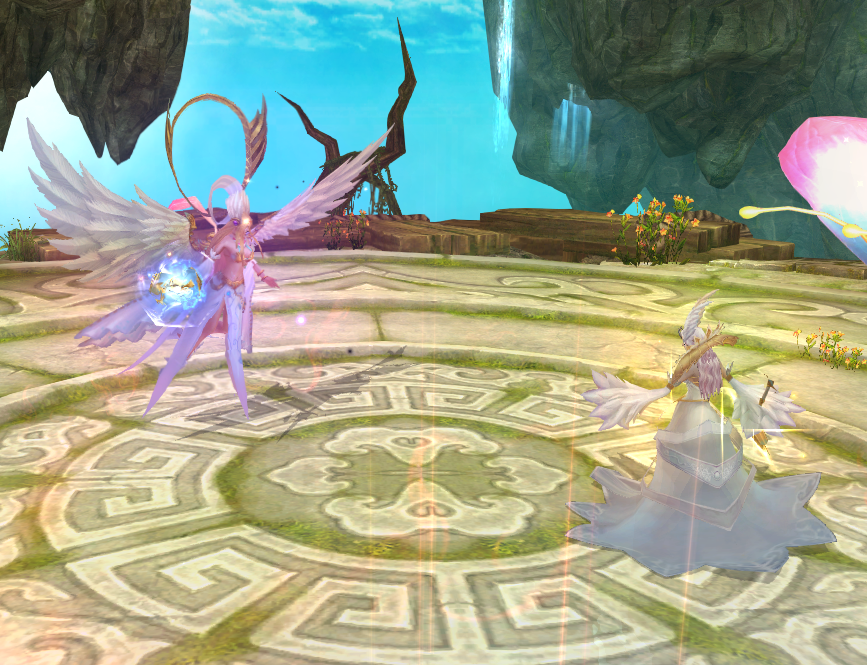
The Illusion Nemen and her Aqua Fiend.
Based on her morphology, the Illusion Nemen has ancient deity or demon lineage. No one knows when or where it has firstly showed up. She always strikes on the back of a dragon, whose five heads represent an omen for total destruction. She has a passive skill that is triggered when taking damage from auto-attacks causing the boss to reduce the damage she takes for a short time. The Illusion Nemen can kill characters that are not barbarians, so it is advised to have a barbarian tank the boss. The boss has two different phases, and players will experience both phases twice during the battle.
First Phase[ | ]
In the Illusion Nemen's first phase, she will have a buff, Aqua Barrier, that makes her immune to debuffs which cannot be removed until she enters her second phase. When beginning the fight, it is recommended to have only the tank attacking the boss at first as players must prevent her from activating a shield before she goes into her second phase. This must be done both times that the boss is in her first phase.
The Illusion Nemen will constantly attack using a blue frontal cone-shaped AoE which kills non-barbarians called Dragon Ascend (this also kills all Stagnant Puddles in its area). At random, the Illusion Nemen will also teleport a player into a nearby Stagnant Puddle which will deal constant damage, so the player must move out of this pool quickly. Shifting Fireflies will spawn in the air which can be killed to spawn dark green Stagnant Puddles on the ground.
The player tanking the boss should position the boss so that her cone-shaped attack hits the puddles and absorbs them. Once the Illusion Nemen has absorbed 9 of these puddles, she will not be able to activate the shield in her second phase. The rest of the players do not need to keep killing the Shifting Fireflies, and can begin to focus on attacking the boss.
At 95% and 45% health, the Illusion Nemen will enter her second phase and transform into an Aqua Fiend via Fiend Assimilation. When she goes into her first phase for the second time at 50% health, players will need to repeat the previous steps to prevent her from activating her shield before she goes into her second phase again.
Second Phase[ | ]
The Illusion Nemen will enter her second phase at 95% and 45% health. She will no longer be immune to debuffs, so players will be able to deal a lot more damage to her. The boss will have a buff preventing her from being killed, which will not be removed until the second time she enters this phase at 45% health. If the squad did not force her to absorb enough Stagnant Puddles in her first phase, she will have a fog barrier on her which reduces the damage she takes called Aqua Barrier.
The Illusion Nemen will constantly use a Tail Sweep attack that kills players from behind, so the majority of the squad should focus on standing on either side of her. In this phase, non-barbarians can tank the boss from the front but need to be fairly tanky to survive her attacks. She will also attack with an AoE which interrupts nearby players' channelling called Scale Blade. She will also spit a constant cone of water at the tank for several seconds, spawning Stagnant Puddles on the target's location with each hit via Fiend Breath. These puddles will deal constant damage to anyone who stands in them.
Once the Illusion Nemen reaches around 50% health or less, she will knock players in the air and then backwards via a quick succession of Flow Impact then Whirlpool Sweep. She will then revert back to her first phase with 50% health via Cancels Assimilation and be immune for a short time; Her skill damage will also be increased by 50%. Players should wait until she has the debuff immunity back on her before damaging her or she may gain the buff during her second phase, making her tedious to kill.
When the Illusion Nemen enters her second phase for the second time, she can be killed and won't go back into her first phase again.
Drops[ | ]
The Illusion Nemen will drop a total of 30 items.
| Item | Chance |
|---|---|
| 0.4% | |
| 4% | |
| 8% | |
| 4.1667% | |
| 4.1667% | |
| 4.1667% | |
| 4.1667% | |
| 70.9332% |
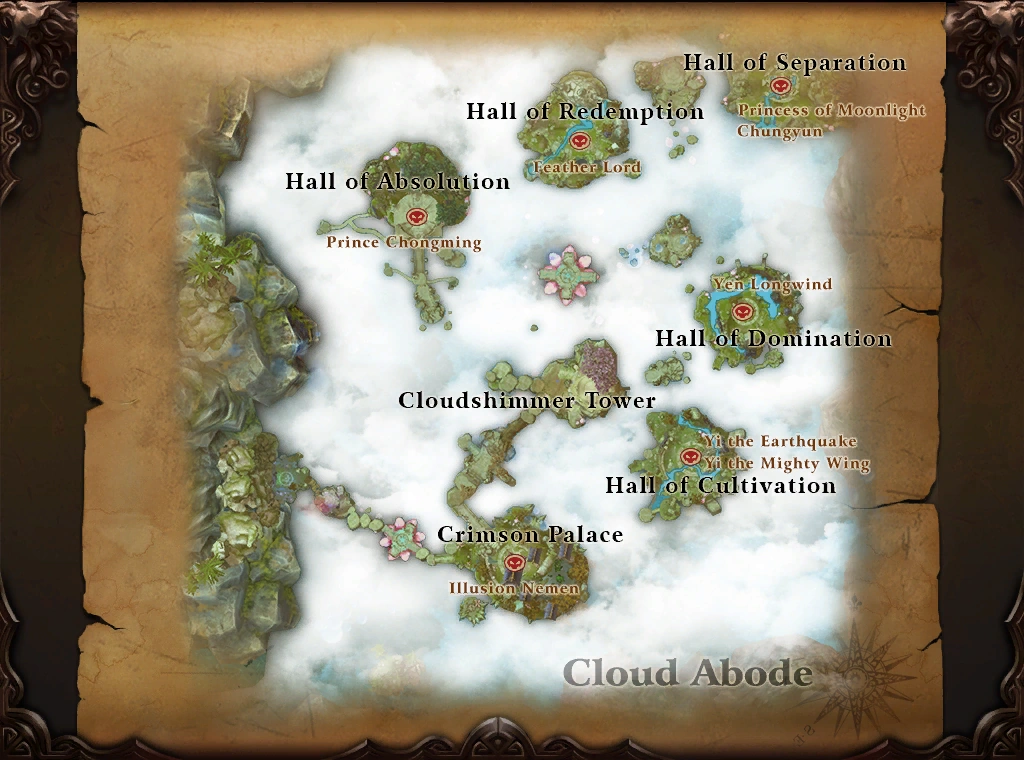
Cloudshimmer Tower[ | ]
Ien the Arbor and Tsuan fighting each other.
The Cloudshimmer Tower is the central part of the dungeon that allows access to the other floating islands. After killing the Illusion Nemen, players can go along the northwest path (not the path they came from). Along the way they will find more White Cloaks and Lehrons to kill. Once the player reaches Cloudshimmer Tower, they will find Tsuan fighting with her mother, Ien the Arbor. Multiple Inner Demon: Arrogance will also be found here, which players must kill to free Ien the Arbor. When the Inner Demons reach below 30% health they will explode, dealing deadly damage to nearby players via Hostility Surge. When enough of these Inner Demons have been killed, Ien the Arbor will transform into Tainted Ien, a mini-boss.


Tainted Ien
Tainted Ien can attack in a straight line in front of her via Dark Intention, dealing damage to players and converting the damage into health for herself. She will also use an AoE that damages nearby players and gets stronger the lower her health is via Dark Kinetics. Players should avoid standing in front of her and work to kill her quickly to prevent her from healing up or killing players when she is at low health.
When Tainted Ien is defeated, she will turn back into Ien the Arbor, this time as an NPC. The squad leader can then choose the Hall of Redemption or the Hall of Cultivation quest from Ien to unlock access to them. The Hall of Absolution contains the boss Prince Chongming, The Hall of Redemption contains the boss Feather Lord, the Hall of Domination contains the boss Yen Longwind and the Hall of Cultivation contains the bosses Yi the Earthquake and Yi the Mighty Wing. Currently, players are not able to access the Hall of Absolution or the Hall of Domination, but will be able to in a future update.
After the squad has defeated the bosses from two of the four among the Hall of Absolution, the Hall of Redemption, the Hall of Domination, and the Hall of Cultivation, Ien the Arbor will be able to unlock access to the Hall of Separation, where the final bosses can be found.
Hall of Absolution[ | ]
Once the squad leader has taken the Hall of Redemption quest from Ien the Arbor, she will move and reveal a path on the western side of Cloudshimmer Tower which will lead players to the Hall of Redemption. Players should be careful to not fall while crossing along the path; those who fall will be teleported back to Cloudshimmer Tower. The path will continue to reveal itself as players reach a tree branch which will take them to the Hall of Redemption. Go across the trunk and up the stairs to find Prince Chongming, the main boss of the Hall of Redemption.
Prince Chongming[ | ]

Prince Chongming
Prince Chongming is the second child of Emperor Tsang, and the young brother of the Princess of Moonlight. When Minister Tsu tried to take over the empire, she coerced Prince Chongming to be her puppet. Prince Chongming didn't want to contend with his sister for the throne, and was defiant against Minister Tsu's manipulation. He was eventually killed by Minister Tsu, and his royal blood was used to activate the Wheel of Fate. The revived Prince has lost his kind nature. After enduring years of power struggle, he has already been consumed by confusion and anger. Prince Chongming's mind is extremely unstable, and is easily affected by various external factors. He has a high tendency to split into multiple personalities. Prince Chongming has a passive skill which is triggered when taking damage from auto-attacks causing the boss to reduce the damage he takes for a short time.
Prince Chongming has six total personalities, which he will shift between in order at 90%, 60%, 60%, 60%, and 65% HP respectively; fully healing each shift. Prince Chongming will be immune during the transformation. Upon swapping, he will leave a memento to pick up - picking it up will unlock a special skill for use during the battle. Prince Chongming will not leave a memento during the final swap.
Prince Chongming starts in prince mode, and doesn't have any skills in this mode.
His second mode, Conqueror, will spawn a Fists of Conquest on the battlefield; anyone who picks it up will gain the skill Invincible, which will generate massive AoE aggro and gain them the ability to resist the Powerful Forward Punch skill in the final mode. Periodically, Conqueror Chongming will select a random target and charge a leap via Instant Inferno, indicated by an orange circle which does not move as the target moves. Any players caught in the circle when he lands will instantly be killed.
His third mode, Strategist, will spawn a Code of Truth; anyone who picks it up will gain the skill Clarity, an area-of-self AoE sleep debuff purify which also grants immunity to all movement control effects for 8 seconds thereafter. Periodically, Strategist Chongming will generate two black holes in the air above the western and eastern sides of the arena via Collapsing Singularity, and instantly kill any players in their path. Should they collide (which is required for the transformation between Strategist and Trickster to finish), they will destroy each other.
His fourth mode, Trickster, will spawn a Mark of Deceit; anyone who picks it up will gain the skill Insight, which will eliminate fake shadows during the casting of Split Shadow Strike such that players need only dodge the ones which instantly kill players. Periodically, Trickster Chongming will summon numerous Split Shadows, which possess a line attack. Many Shadows are fake, but some are real and will instantly kill any players caught in their attack.
His fifth mode, Spoiled Child, will spawn a Veil of Curse; anyone who picks it up will gain the skill Protection, which will summon a protective shield which lasts 15 seconds and can resist the Sorrow skill in the final mode. Spoiled Child Chongming is the only mode with a noticeably different appearance from the other five, and he will periodically cast Indulgence, which will spawn a protective shield (indicated by the purple aura on the ground) immediately followed by Spoil, which will last for 20 seconds and damage anyone who moves. This status effect is unable to be purified. It is recommended that players preemptively move away from the boss as he is about to cast Indulgence, so as to lure him away from the shield while mitigating damage taken from Spoil.
in his final mode, Crazed Prince Chongming will use all skills from previous modes, with exception to Indulgence. In addition to these four skills (Instant Inferno, Collapsing Singularity, Split Shadows, and Spoil), Crazed Prince Chongming also has a few extra tricks:
- Sorrow: Players will have a warning flash on their screen immediately before Chongming emits flashing blue auras, instantly killing all players which are close enough to him. The player who picked up the Veil of Curse is recommended to use Protection when the warning flashes to ward against this skill. Sorrow will immediately be followed by Instant Inferno.
- Powerful Forward Punch: A charge attack, which will deal several strikes and instantly kill any player who has not warded themself via Invincible from the Fists of Conquest
- Doubt: Mutually exclusive with Daze, a random target is debuffed with a status which will absorb up to 50000 points of healing; when it expires, twice the amount of healing absorbed will be dealt in an 8 meter area-of-self AoE emanating from the player whose debuff absorbed healing
- Daze: Mutually exclusive with Doubt, an AoE sleep spell is cast on a random target; it is recommended that the player who picked up the Code of Truth cast Clarity to purify this effect.
Once Prince Chongming is dead, players should jump off the edge of the island to be ported back to Cloudshimmer Tower, where the squad leader can talk to Ien the Arbor again to unlock access to one of the other three Halls, or the Hall of Separation if they have completed one other already.
Drops[ | ]
Prince Chongming will drop a total of 30 items.
| Item | Chance |
|---|---|
| 1.6667% | |
| 4% | |
| 4.1667% | |
| 4.1667% | |
| 4.1667% | |
| 4.1667% | |
| 77.6665% |
Hall of Redemption[ | ]
Once the squad leader has taken the Hall of Redemption quest from Ien the Arbor, she will move and reveal a path on the northern side of Cloudshimmer Tower which will lead players to the Hall of Redemption. Players should be careful to not fall while crossing along the path; those who fall will be teleported back to Cloudshimmer Tower. The path will continue to reveal itself as players reach a small floating island which will take them to the Hall of Redemption. Go through the gate and up the stairs to find the Feather Lord, the main boss of the Hall of Redemption.
Feather Lord[ | ]
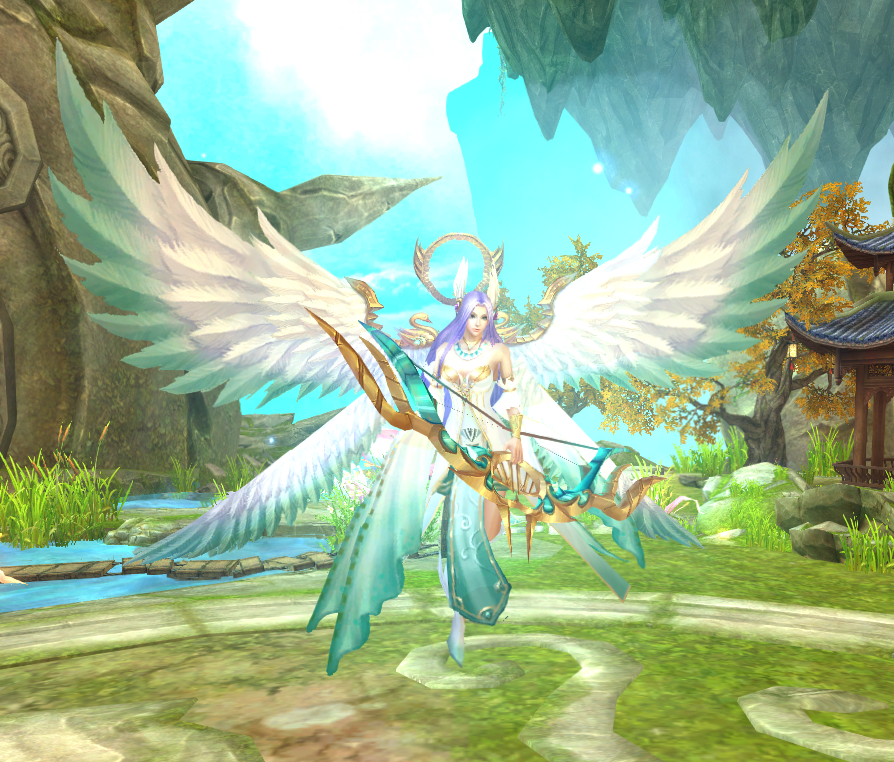

The Feather Lord.
The King of the Longwyr, one of the four ancient Elven nations. The Feather Lord was revered by the elves as a paragon of elven mighty. She has a passive skill that is triggered when taking damage from auto-attacks causing the boss to reduce the damage she takes for a short time. The squad should have a venomancer available for purging, as well as players with interrupting skills and fast attackers.
At the beginning of the battle, the Feather Lord will teleport nearby and cast a shield on herself and begin to channel Guided Aim (also known as Take Aim). She will only take 1 damage at this time and cannot be interrupted due to her Blessed Plume Shell shield. Players can remove this shield by hitting her 40 times, which can be done quickly with players using Attacks-Per-Second (APS) equipment. Once the shield has been removed, players can use interrupting skills to stop her channelling of Guided Aim. If players do not interrupt her in time, she will kill all players in front of her with her Guided Aim. She will use this tactic several times throughout the battle.
On occasion, an on-screen message will appear mentioning Thunder Shock and Ironheart Blessing. The Feather Lord will buff herself with Ironheart Blessing via Sacred Heart Blessing (a green buff icon) which venomancers must purge as soon as possible. With the Ironheart Blessing buff on, the boss will gradually heal as players attack her, quickly bringing her to full health if players do not pay attention. At the same time, the player mentioned in the on-screen message will be debuffed with a metal Damage-over-Time (DoT) skill via Sacred Thunderball. When this DoT is purified or expires, the player will become the target of 3 Thunder Shock attacks, each larger than the last. These attacks are dark rings that are eventually struck with lightning, killing any players standing in them. The player mentioned in the on-screen message should move far away from the rest of the squad to prevent killing them.
The Feather Lord will eventually teleport via Flicker, cast a shield on herself and begin to channel Blessing of Immortality which must be interrupted or she will fully heal herself and take 10% less damage for the rest of the battle. Again, players must hit the boss 40 times to remove the shield before they can interrupt her channelling. Once players successfully interrupt her channelling, she will teleport again and begin her Rain of Feathery Death phase.
During the Rain of Feathery Death phase, the boss will gain 8 layers of a thunder shield buff which must be removed in a different way to the other shields. The thunder shield needs to be removed within 90 seconds. Purple Glistening Pegasi will constantly spawn during this phase and charge players, dealing damage and stunning any players they hit.
10 dark circles will appear on the ground and Feathershock Arrows will slowly fall down towards these circles. At least one player must stand in each circle to "catch" the arrows. If an arrow pierces the ground with no player to "catch" it, the squad will take damage equal to 80% of their health via Feathery Armageddon, which can be quickly fatal. If the player "catches" an arrow successfully, a Feathershock Arrow will appear on the ground which can be dug. Players should move to other circles after "catching" arrows until all 10 have been accounted for.
To remove the thunder shield, players must dig the Feathershock Arrows and use them on the boss by right-clicking them in their inventory or in the on-screen prompt. This will remove a layer of her thunder shield. Once all 8 layers of the thunder shield have been removed, the Feather Lord will no longer be able to cast her Rain of Feathery Death skill, and will begin to fight normally again. This phase can repeat multiple times throughout the battle but will only be triggered when interrupting the boss's Blessing of Immortality skill.
Once the boss dies, head back through the previous gateway, and there will be a blue portal nearby next to the floating path. Go into the portal to return to Cloudshimmer Tower, where the squad leader can talk to Ien the Arbor again to unlock access to one of the other three Halls, or the Hall of Separation if they have completed one other already.
Drops[ | ]
The Feather Lord will drop a total of 30 items.
| Item | Chance |
|---|---|
| 0.4% | |
| 4% | |
| 8% | |
| 4.1667% | |
| 4.1667% | |
| 4.1667% | |
| 4.1667% | |
| 70.9332% |
Hall of Domination[ | ]
Once the squad leader has taken the Hall of Cultivation quest from Ien the Arbor, she will move and reveal a bridge on the northeastern side of Cloudshimmer Tower which will lead players to the Hall of Cultivation. Go along the two bridges and up the crystal and stairs on the next island to find find a husk of a man - the Ghoul General, Yen Longwind.
Yen Longwind[ | ]


Yen Longwind
Yen Longwind was the great general of the Twilight Emperor, and was the father of Ren Bin. He helped Emperor Tsang in his conquest for decades, and became the most trusted right-hand man of the Emperor. When Emperor Tsang died, the Twilight Empire descended into a chaos. Because of his favor for his son, Yen Longwind joined hands with Princess of Moonlight. When Ren Bin was killed by Chungyun, Yen Longwind killed himself in extreme grief. After the Princess of Moonlight activated the Wheel of Fate, Yen Longwind was brought back to continue serving the Twilight Empire. Yen Longwind's new body was as indestructible as steel. You have to weaken him first before you can deal real damage. The pair of demon horns seem to be the source of his power. He has a passive skill that is triggered when taking damage from auto-attacks causing the boss to reduce the damage he takes for a short time.
The squad will see a set of two crystals, each with their own aura - one red and one purple. In between the auras is Ghoul General, Yen Longwind - Yen Longwind's former body. These two Soulbinder Crystals absorb energy from monster deaths - when the main boss gets angry enough about this (50 points for one crystal), he will smash it, giving the squad opportunities to cut his horns off and thus make him vulnerable. When starting the fight, the squad is recommended to pull Ghoul General to one of the two crystals fight him, such that it absorbs his energy on death - Ghoul General cannot die in full (one can't kill what's already dead, plus he has Dark Haunting, which heals him whenever he dies), but when he dies, the Soulbinder Crystal whose aura he's in will gain 30 points.
When Ghoul General is killed the first time, Yen Longwind will come up the cliffside, enraged; he'll immediately cast Earthen Thrall and smash the ground, spawning a number of thralls (any thrall killed in the aura of a Soulbinder Crystal will yield 1 point to that crystal); these thralls are much weaker than either boss, but should still be heeded:
- Hunger Ghoul: attacks target for 10% of max HP
- Venom Ghoul: spits a blob which lands and deals AoE damage equal to 25% of max HP
- Blister Ghoul: explodes, dealing lethal damage in melee range
- Banshee Ghoul: boosts the defense of all other thralls
Hunger Ghoul
Venom Ghoul
Blister Ghoul
Banshee Ghoul


Despite the relative weakness of these, they gain strength in numbers. The squad is recommended to eliminate them quickly, attempting to kill them near a Crystal, but killing them should be the priority. Periodically, Yen Longwind will shoot lasers at random targets, spawning dark fire under their feet, which will be ignited after 2 seconds, dealing lethal damage (Dark Fire Conjuration). Once this skill has been cast three times, he will inhale all the fire and breathe it out in a certain direction as indicated in Normal Chat; any player hit by this Flame of Omen will be dealt damage for 80% of max HP.
Meanwhile, the Ghoul General will be doing its own things on the ground; it periodically sends a slash down a straight line via Dark Light Slash, attacking all players it hits. Sometime it'll divert its attention to a random target without aggro and go Into the Fray, dashing with two hits at their location. At 85% and 30% HP, it will use Focus Order and command one type of thrall to go after a specific player. In particular, the squad should watch out for the blue Shield of Hostility, which absorbs up to 3 million damage for 8 seconds, dealing up to 30000 damage at the end of this based on how much damage it absorbed. Players are recommended to simply leave the Ghoul General alone during this, going back to it after.
Once a Soulbinder Crystal reaches 50 points, Yen Longwind will become enraged and Shatter Crystal, giving players an opportunity to run up his arm (the aggro holder of Ghoul General is recommended to stay on the ground) and kill his horns. Each horn will be broken off at 50% HP, and players are recommended to kill them simultaneously, as they possess Regeneration, which respawns a broken horn in 20 seconds should the other horn still be whole. Once the horn is broken, Yen Longwind will finally be vulnerable and can be killed.
Players can then go back part of the way they came and enter a blue portal. Go into the portal to return to Cloudshimmer Tower, where the squad leader can talk to Ien the Arbor again to unlock access to one of the other three Halls, or the Hall of Separation if they have completed one other already.
Drops[ | ]
Yen Longwind will drop a total of 30 items.
| Item | Chance |
|---|---|
| 1.6667% | |
| 4% | |
| 4.1667% | |
| 4.1667% | |
| 4.1667% | |
| 4.1667% | |
| 77.6665% |
Hall of Cultivation[ | ]
Once the squad leader has taken the Hall of Cultivation quest from Ien the Arbor, she will move and reveal a bridge on the southeastern side of Cloudshimmer Tower which will lead players to the Hall of Cultivation. Go along the bridge and up the stairs on the next island to find the next two bosses, Yi the Earthquake and Yi the Mighty Wing.
Yi the Earthquake and Yi the Mighty Wing[ | ]


Yi the Earthquake. He is immune to elemental damage.

Yi the Mighty Wing. He is immune to physical damage.
Yi the Earthquake is the King of Arwyr, one of the four Elven nations, and the uncle of Yi the Mighty Wing, who is the King of Honwyr, another one of the four ancient Elven nations. The squad should have both physical and magic classes to damage the bosses, as well as characters with knockback or reel-in skills. Players will have to kill these bosses simultaneously as they both will attack at the same time, but do not need to kill both bosses at the same time. When one boss dies, the surviving boss's attack will be increased by 100% by Frenzy. It is recommended to kill Yi the Earthquake first.
Yi the Earthquake is immune to elemental damage (Elemental Deflection), while Yi the Mighty Wing is immune to physical damage (Physical Deflection). The bosses must be separated from each other for the majority of the battle; if Yi the Mighty Wing enters Yi the Earthquake's blue circle, they will begin to heal each other via Symbiosis. Yi the Earthquake possesses the Stampede skill, which is an attack only barbarians can withstand - should a barbarian be hit by his normal attacks, he will automatically aggro to said barbarian.
On occasion, Yi the Earthquake will cast Thunder Storm, which debuffs all players with 1 stack of Mark of Thunder. If Mark of Thunder reaches 8 stacks it will kill players, but it cannot be purified using skills. At the same time, Yi the Mighty Wing will cast the Plume Shot area-of-self attack, indicated by a purple circle on the ground. A Plume Shot arrow will appear on the ground where players have been hit by the attack. Attacking the Plume Shot arrow will spawn a Plume Shot - Thunder (a blue arrow), which will remove the Mark of Thunder debuff from nearby players. Players should ensure they are getting hit by the Plume Shot AoE so that other players can purify themselves.
Once one of the bosses reaches 60% and then 20% health, the Storm of Heavenly Thunder phase will begin. This phase will only happen twice during the battle. During this time, both bosses will become immune to all damage, and Yi the Earthquake will teleport into a golden circle on the middle of the battlefield. Players must bring Yi the Mighty Wing close to Yi the Earthquake so that his Plume Shot - Mighty Break gets interrupted. The bosses will not heal each other if they get close to one another during this phase. Plume Shot - Break (purple arrows) will appear on the ground. Players must bring these into Yi the Earthquake's golden circle, either by knocking them back or by reeling them in. Once all of the arrows are in the circle, the bosses will be vulnerable again and the Storm of Heavenly Thunder phase will end. Separate the bosses again, as they will be able to heal each other again.
After the second phase has ended, Yi the Earthquake will begin spawning Thunder Shards. If they are not killed within 10 seconds, they will explode and inflict all players with 1 stack of Mark of Thunder. Multiple can spawn at a time, quickly becoming deadly.
Yi the Earthquake will occasionally spawn Thunder Pools on players with high threat, which deal damage to those who stand in them. They will, however, protect players if Yi the Mighty Wing casts his lethal attack, Arrow from Heaven. These pools disappear and will no longer spawn after Yi the Earthquake dies. They also will not appear during the Storm of Heavenly Thunder phase (nor will Thunder Shards).
Yi the Mighty Wing will occasionally use his lethal attack Arrow from Heaven, which can kill the entire squad. A red on-screen message will appear when he is about to cast it. Players can stand in Yi the Earthquake's Thunder Pools to avoid dying. If there are no Thunder Pools or if Yi the Earthquake is dead, players will have to rely on well-timed immunity skills and items to avoid dying. He will not cast this skill during the Storm of Heavenly Thunder phase.
Once both bosses have been killed, a Shining Elven Treasure will spawn which contains the drops for both bosses. Players can then return to Cloudshimmer Tower by going into the blue portal next to the bridge that they used to get to the island, where the squad leader can talk to Ien the Arbor again to unlock access to one of the other three Halls, or the Hall of Separation if they have completed one other already.
Drops[ | ]
The Shining Elven Treasure will drop a total of 30 items.
| Item | Chance |
|---|---|
| 0.4% | |
| 4% | |
| 8% | |
| 4.1667% | |
| 4.1667% | |
| 4.1667% | |
| 4.1667% | |
| 70.9332% |
Hall of Separation[ | ]
After players have defeated the bosses in the Hall of Redemption and the Hall of Cultivation, they will be able to activate the Hall of Separation. After the squad leader takes the Hall of Separation quest from Ien the Arbor, she will move to reveal a path on the northeastern side of Cloudshimmer Tower which will lead players to the Hall of Separation. Along this path, Lehron and monsters from Twilight Temple Revisited Part 1 will appear and attack the players. Try to avoid having less than 35% health; those who do can be killed by the Revived Head Hunters.
Halfway along the path, on the small island, will be more Part 1 monsters and more White Cloaks. Soulbanishers can paralyze players that stand within its blue rectangular attack range. Continue along the path and deal with the Part 1 and Part 2 monsters that appear.
In the Hall of Separation is the Princess of Moonlight, one of two final bosses of this dungeon, along with Chungyun.
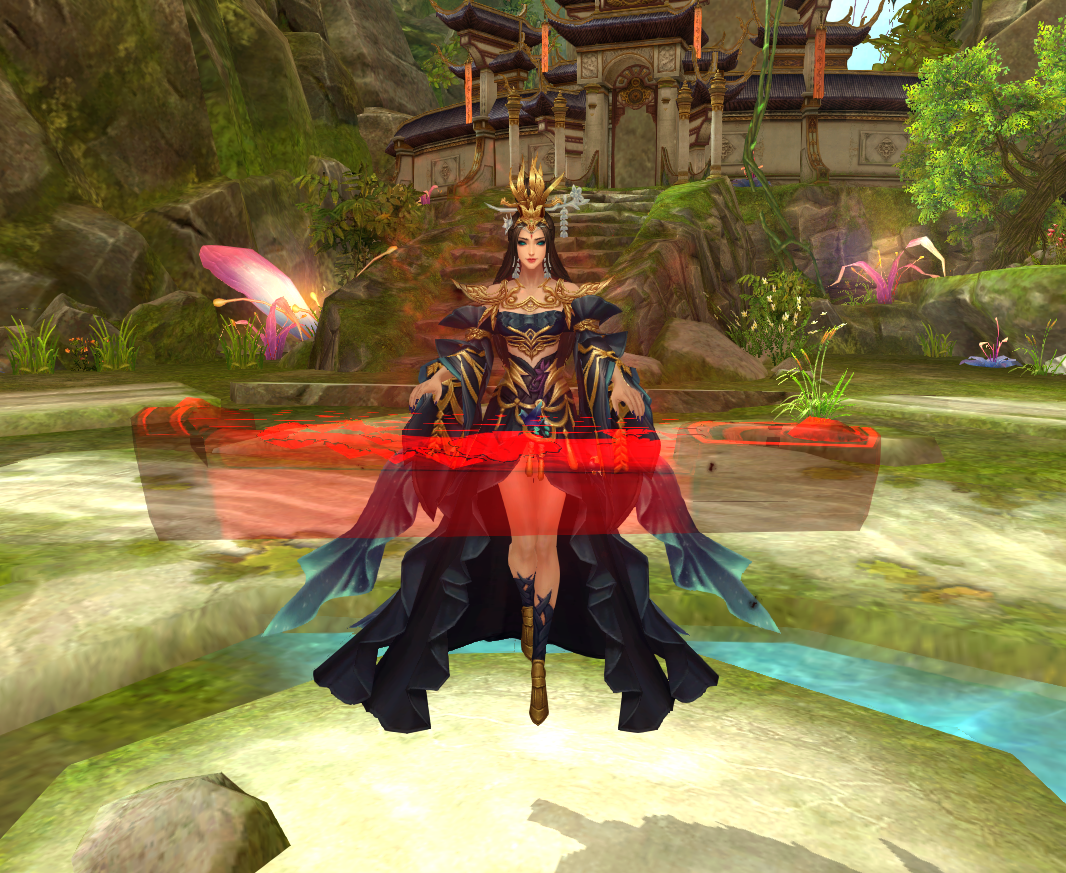
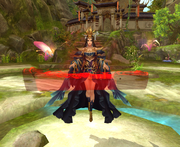
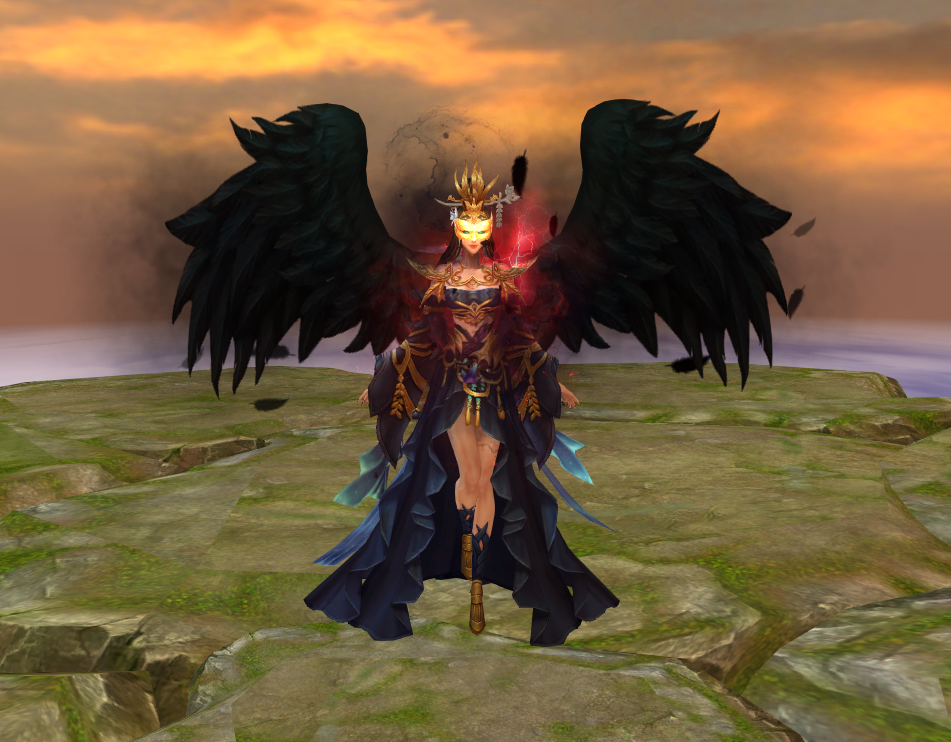
Princess of Moonlight[ | ]
The Princess of Moonlight.
The Princess of Moonlight is the daughter of Emperor Tsang, and the most beautiful woman in the Western Continent. She has a passive skill that is triggered when taking damage from auto-attacks causing her to reduce the damage she takes for a short time.
At first, players will have to battle the Princess of Moonlight. Once she reaches low health she will summon Chungyun to fight for her, who is much more difficult in comparison. The Princess of Moonlight only has a few different tactics, most of which only occur before she summons Chungyun.
During the battle with the Princess of Moonlight, an on-screen message will appear stating that a certain player has been linked to another player. There will be a red link between these two players. The player that is mentioned in the on-screen message will take constant damage via Umbilical Connection, and will kill the player they are linked to if they die; the two players can run away from each other to break the link. The Princess of Moonlight will stop using this skill when Chungyun appears.
Before Chungyun appears, the Princess of Moonlight will also use a red cone-shaped AoE, Jade Blood Strumming, which players must avoid. A Blood Paper Crane will spawn on the location of any players that were hit by the AoE, and multiple can spawn at a time. If the boss's red cone-shaped AoE then hits these Blood Paper Cranes, it will deal lethal damage to players, and the crane will turn into a Bloodsoaked Phoenix which will attack players for the rest of the battle. The boss will stop using this attack once Chungyun appears.
Throughout the entirety of the battle, even when Chungyun appears, the Princess of Moonlight will cast Heart String Burst on a random player. The player will see a blood circle underneath them. Other players must avoid standing in this circle; if the afflicted player is healed, they will deal damage to all other players standing within their circle equal to the amount they were healed for. In many cases this will cause players to die.
Once the Princess of Moonlight is at low health she will become immune to damage and summon Chungyun. At this point she will constantly support Chungyun, healing him over time and reducing the damage he can take via Blessing of Moon.
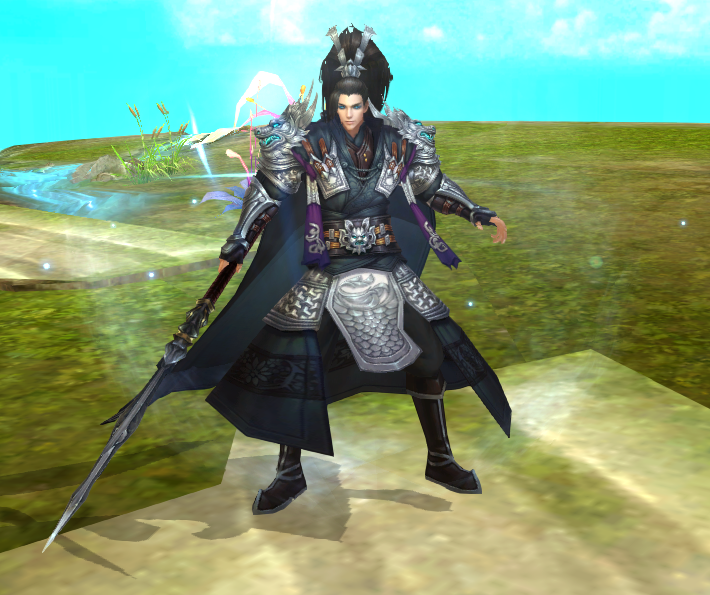
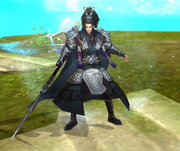
Chungyun[ | ]
Chungyun.
Chungyun was a favored general under the command of Minister Tsu who fell in love with the Princess of Moonlight. He has a passive skill that is triggered when taking damage from auto-attacks causing him to reduce the damage he takes for a short time. He is also Tough, making him harder to kill. He will appear once the Princess of Moonlight is at low health.
Chungyun is immune to taunt skills via Tough, so players will not be able to aggro him as normal. Players must try to kill him within 5 minutes, or he will greatly increase his attack via Frenzy. During the battle his attack will also gradually increase with each hit via Chant of Murder, but will reset if a player dies. The Princess of Moonlight will also be healing him constantly and buffing him with increased defense.
If Chungyun is too far away from his target, he may swap targets or use 1 of 2 skills instead. If he doesn't swap targets, he may charge the target, hitting them and reducing their movement speed via Cloud Rush. If he doesn't charge the target, he will instead leap at them, smashing down and dealing damage to all players within 10 meters via Dragon Dust.
If Chungyun's target is in melee range, he may randomly attack with a frontal cone-shaped AoE several times (Disastrous Fate), dealing high amounts of damage to all players within the attack's range. If Chungyun has spent a while attacking the same target, he will cast a skill that knocks back all players near the target followed immediately by an additional knockback near himself (Impact followed immediately by Dragon Shriek).
If there are players standing behind Chungyun, he will sense this and use the 90-degree AoE Dark Dragon Tail behind him, knocking players back and dealing a high amount of bleed damage.
Once Chungyun is at low health, the Princess of Moonlight will begin to put on the Golden Mask and the screen will turn black. When the screen turns back to normal, players will have been teleported to an island where they will face the true final boss, the Frenzied Princess of Moonlight. Chungyun can be seen kneeling to one side of the island and will not fight.
Frenzied Princess of Moonlight[ | ]

The Princess of Moonlight after putting on the Golden Mask.
The Frenzied Princess of Moonlight is the true final boss of this dungeon. Players will only have one chance to battle this boss. If all players die, the Frenzied Princess of Moonlight will disappear and players will only get a Dull Twilight Treasure. If players survive, they will succeed and see the ending to the Rhapsody of the Revived chapter. They will also receive a Shining Twilight Treasure instead, containing a Smoke Emerald Shard and the small chance of getting a Moonlight Crystal. Bestiary information for this boss is intentionally missing, as the developers purposefully left it out so as to leave this boss's abilities as a surprise.
It is important to have a cleric or mystic to resurrect players during this battle to ensure that at least one player stays alive. Players should also spread out to avoid the multiple dangerous AoEs that occur during this battle. The island that the battle occurs on is made up of multiple platforms which can be destroyed during the battle.
A red on-screen message will appear stating that the Princess of Moonlight is about to cast Demonic Breath. A red circle will appear around her, with 5 red lines spanning outwards, dividing the island. If players stand anywhere in the red circle or lines, they will be killed. The AoE will then move in a clockwise direction and continue to hit several times, so players must continue to move clockwise while fighting the boss. Eventually the AoE will disappear, but will occur constantly throughout the fight.
On occasion, the Princess of Moonlight will summon a meteor to the platform with the most players standing on it. A red circle will appear on the ground which players must move from or they will die. A crack will appear on the platform after the meteor hits. If another meteor hits the same part of the island, the platform will be destroyed, making it more difficult for players to maneuver during the fight.
Toxicant Fiends will constantly spawn during the battle, which players must kill as soon as possible. They will slam the ground, inflicting players with a fire DoT for 15 seconds. The Princess of Moonlight will eventually absorb any living Toxicant Fiends, healing herself. She will use a cone-shaped AoE attack in the direction of the Toxicant Fiend that she is absorbing. If any players are caught in the AoE, they will take a massive amount of damage, will be inflicted with a 10-second fire DoT, and their movement speed will be reduced.
A Darkshock Fiend may also occasionally spawn, which will walk onto the island and then attack players. It has the Stampede stat, so it will deal larger amounts of damage to players that are not barbarians. This monster should be killed as soon as possible. It can use an AoE attack that deals massive damage to non-barbarians, inflicts them with a fire DoT, and slows their movement speed.
Eventually when the Princess of Moonlight's health is low and the battle has lasted long enough without all players dying, she will become immune and float up to the air, ending the battle. Chungyun, not wanting to see the world be destroyed, will stand up and throw his spear, impaling the Princess. He will leap up and catch her as she falls, bringing her to the ground. Chungyun will take the Princess of Moonlight's body, still impaled with the spear, and impale himself with the same spear. He will embrace the Princess as their clothes turn from black to white and they both die. The Shining Twilight Treasure will then spawn.
Drops[ | ]
If all players die before the Frenzied Princess of Moonlight does, a Dull Twilight Treasure will spawn after the battle. The Dull Twilight Treasure drops a total of 30 items.
| Item | Chance |
|---|---|
| 0.4% | |
| 4% | |
| 8% | |
| 4.1667% | |
| 4.1667% | |
| 4.1667% | |
| 4.1667% | |
| 3.3333% | |
| 67.5999% |
If players manage to successfully survive the Frenzied Princess of Moonlight, a Shining Twilight Treasure will spawn after the battle. The Shining Twilight Treasure drops a total of 30 items. A Smoke Emerald Shard is guaranteed to drop from the Shining Twilight Treasure.
| Item | Chance |
|---|---|
| 0.4% | |
| 4% | |
| 8% | |
| 4.1667% | |
| 4.1667% | |
| 4.1667% | |
| 4.1667% | |
| 3.3333% | |
| 3.3333% | |
| 0.0333% | |
| 64.2333% |
Videos[ | ]
- Twilight Temple Revisited Part 2 Walkthrough
- Illusion Nemen Walkthrough
- Yi the Earthquake and Yi the Mighty Wing Walkthrough
- Princess of Moonlight and Chungyun Walkthrough
- Complete Run Guide prior to Prince Chongming and Yen Longwind
- Solo Run (Prince Chongming and the Yis)
- Full Run with 2 players (Prince Chongming and Yen Longwind)
| Dungeons | |
|---|---|
| The Midlands |
|
| Call to Duty | |
| Lothranis and Momaganon | |
| Morai | |
| Primal World | |
| Celestial Vale | |
| The Western Steppes | |